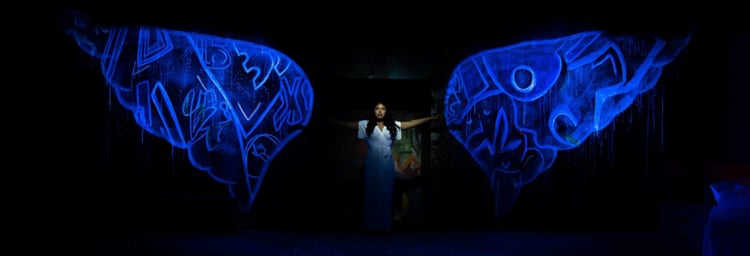
In January 2017 I taught a workshop entitled “Depth and Dimension with UV Paint” for Southwest USITT, which was hosted by the University of Oklahoma in Norman. The challenge was to “surprise” the audience with a UV image created with Rosco Fluorescent and VividFX paint that was thinly applied to specific areas of another painted image. The workshop demonstrated how this technique could create several unique effects, including turning a daytime image into a twinkling night sky or adding a glow to a hot air balloon. One of the Scenic Painters, Jenn Bobo, took the UV techniques I taught in the workshop and immediately put them to work. Read Jenn’s story below to see how UV Effects played a pivotal role in the scenic design for a production of “Angels in America.”
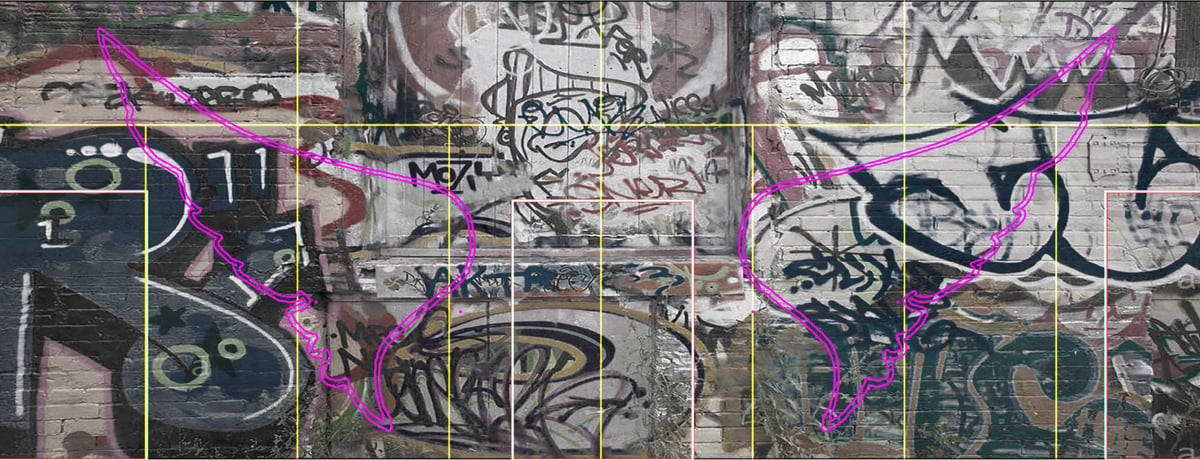 Jenn Bobo’s original graffiti wall paint elevation
In the fall of 2017, the UV project of my dreams was proposed as a possibility. My design advisor, Jon Young, approached me with a request for using UV paint in the University of Oklahoma Helmerich School of Drama productions of Angels in America: Millennium Approaches and Perestroika. I was thrilled and immediately started collaborating with the directors of both productions and members of the creative team to create a mural on the upstage wall and we discussed the potential of incorporating the use of UV paint for the production. The final design was a graffiti mural that masked the UV wings that would illuminate in the angel’s presence.
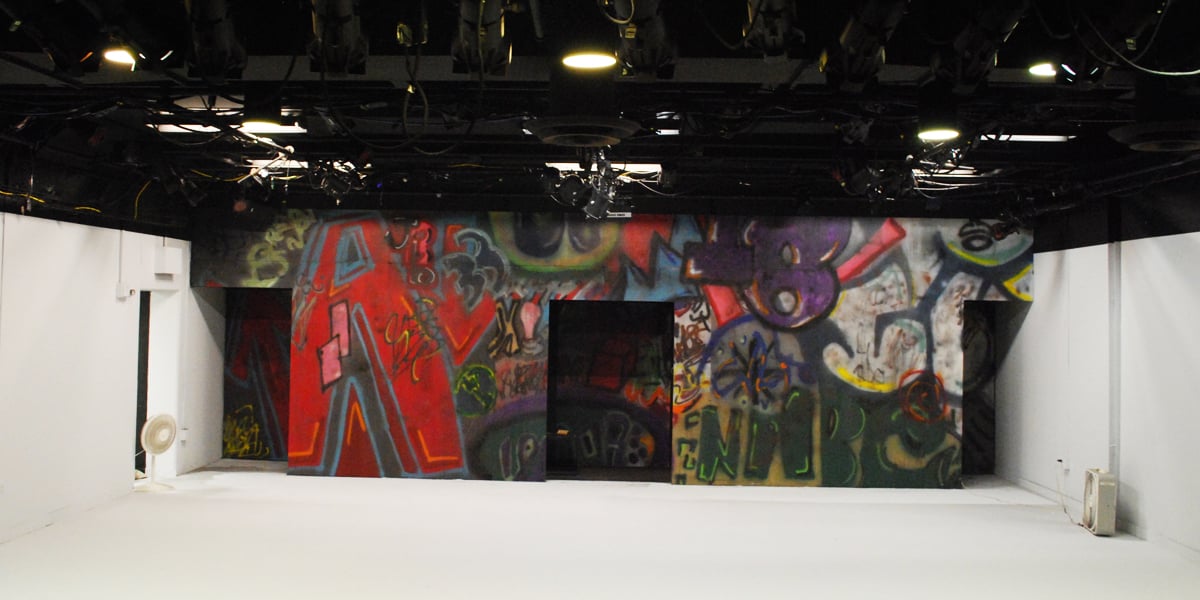 Completed graffiti wall
I began by painting 10 sheets of Masonite a latex base grey. Now ready to start the graffiti process, I followed my designed elevation and then deviated from it and improvised once I understood spray paint and the layering process of graffiti. A helpful resource during this part of the project was a book titled Graff: The art and technique of Graffiti by Scape Martinez. This helped me understand the graffiti process and had good examples of different styles. Ultimately I was able to design on the spot as I freehanded whatever came to mind.
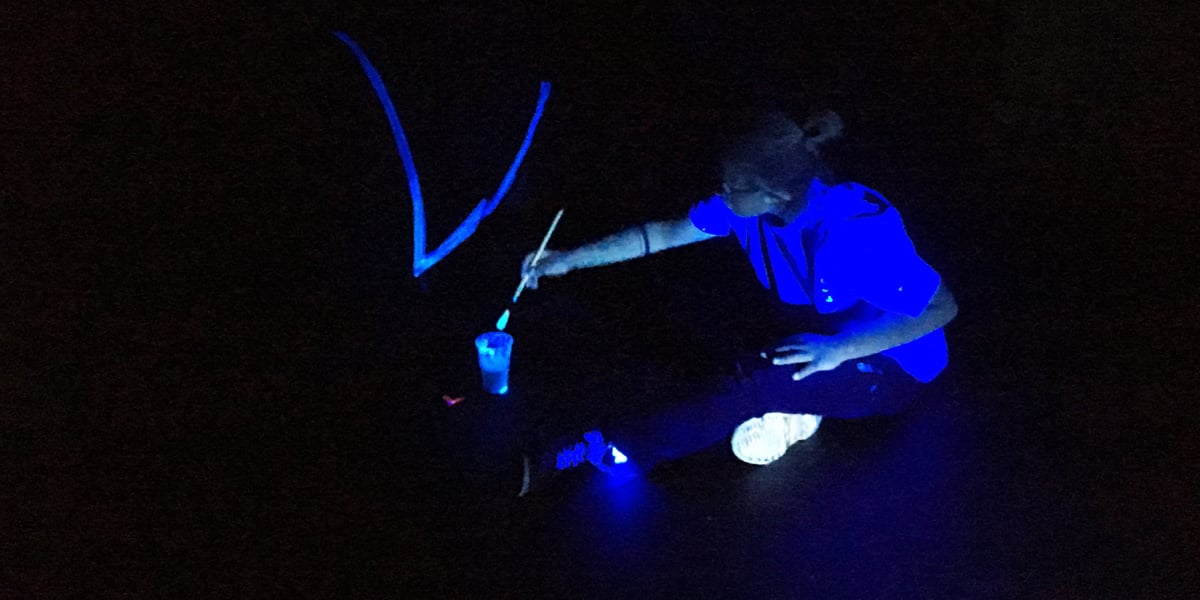 Jenn Bobo, bathed in UV light, begins to paint the angel wings with Rosco Invisible Blue paint
Next, I began painting the wings. Using my elevation as a reference photo, I freehanded the outline of the wings in 50% intensity of Rosco Fluorescent #5785 Invisible Blue. UV paint has to be mixed according to brightness. In order to achieve a 50% UV-intensity, I mixed one part of paint to two parts water.
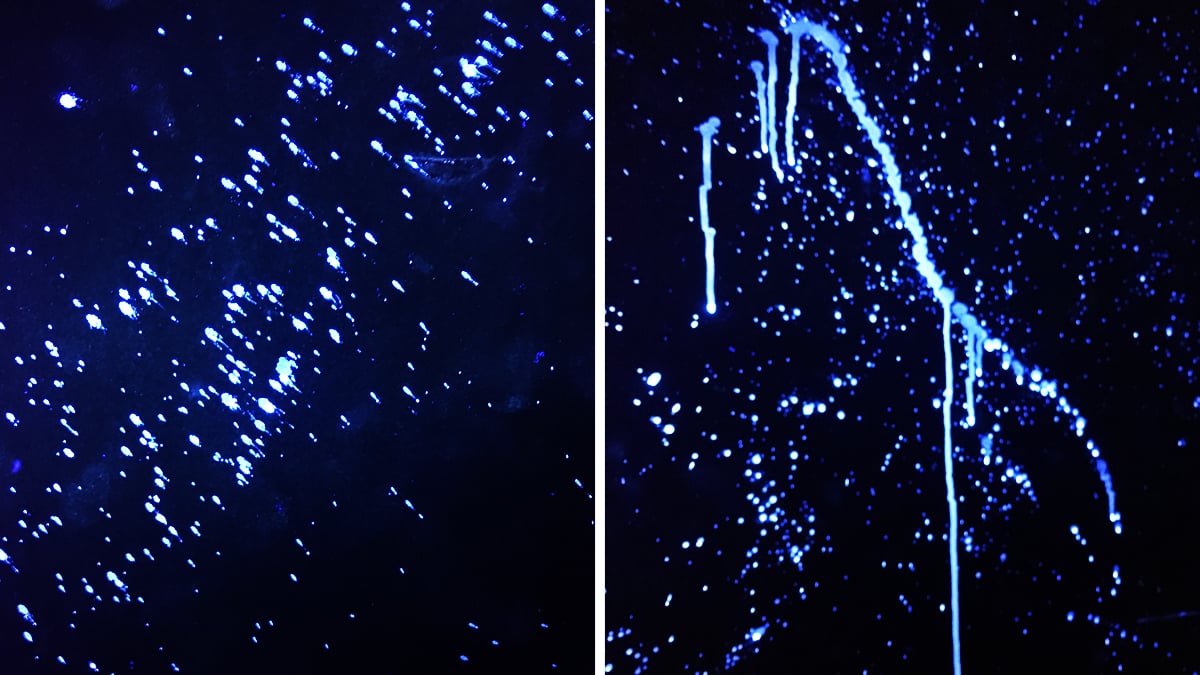 Examples of the Invisible Blue spatter and splatter texture inside the wings
Alternating between 30% and 50% UV-intensities, I spattered the inside of the wing outlines using a 3” chip brush. This created a back glow of UV behind the graffiti letters. After that, I came back and started laying a wash of 50% UV on top of the graffiti inside the wings.
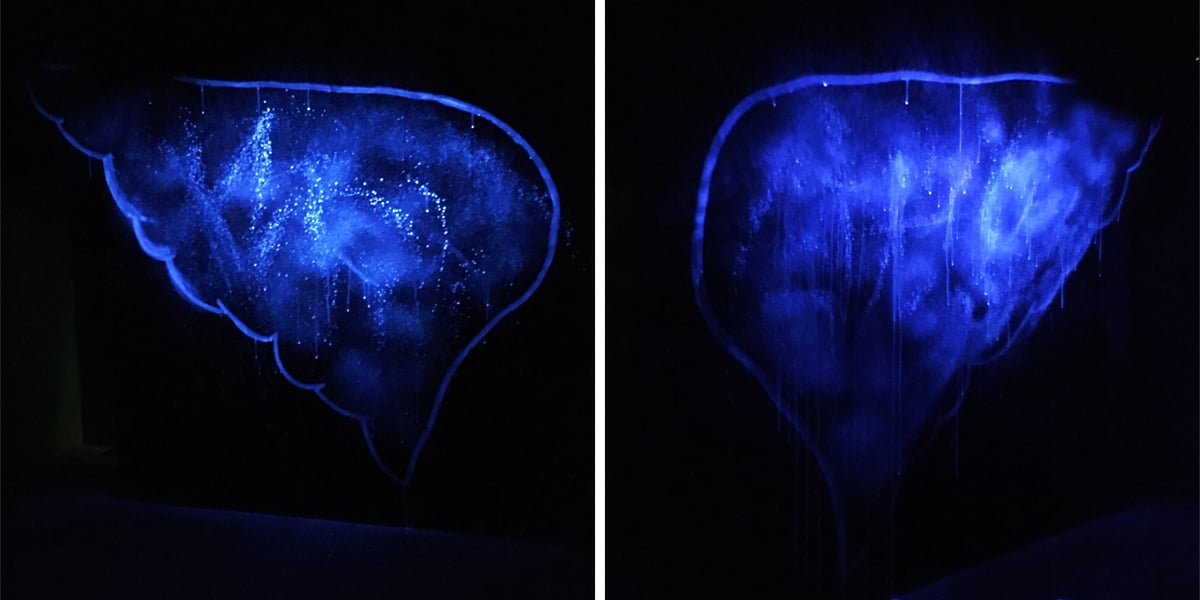 The angel wings - outlined and textured using Invisible Blue
Finally, ready for color, I placed a variety of Rosco Vivid FX and Fluorescent paints on a tray with some water and went back under the UV light. The runny UV paint mixture ran down on the smooth surface creating low-intensity drips that I used to my advantage. Here I didn’t measure out intensities because I needed to color match to the graffiti. Alternating between UV light and the work lights I filled in the 50% graffiti outlines with low-intensity color.
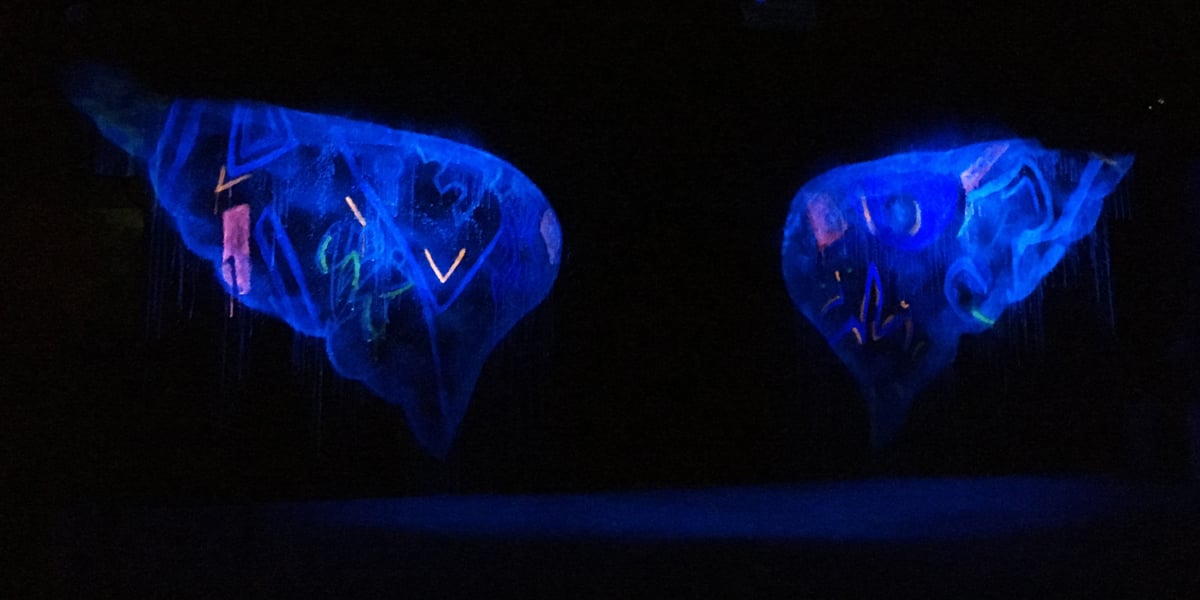
As I hesitantly figured out the characteristics of UV, I realized my intensity was far too low for the overwhelming presence of the angel. I used a mixture of 6 parts water to 1-part Invisible Blue paint and outlined both the wing and the graffiti again. I also went back with color and matched the intensity by eye to the stronger outline. To finish, I used a 5 parts water to 1-part paint mixture and spattered over the interior of the wings letting it drip.
The final wings displayed strong and bold under UV light, yet remained discreetly hidden away under normal stage light as the milky white of the Invisible Blue was masked in the lines of the graffiti background. I also added an Ultraviolet floor treatment that consisted of a 30% and 50% UV-intensities that I spattered using a P50 sprayer fanning out from the center entrance. I finished the floor treatment using a 10:2 - water:paint ratio and a 3” chip brush to spatter the area again.
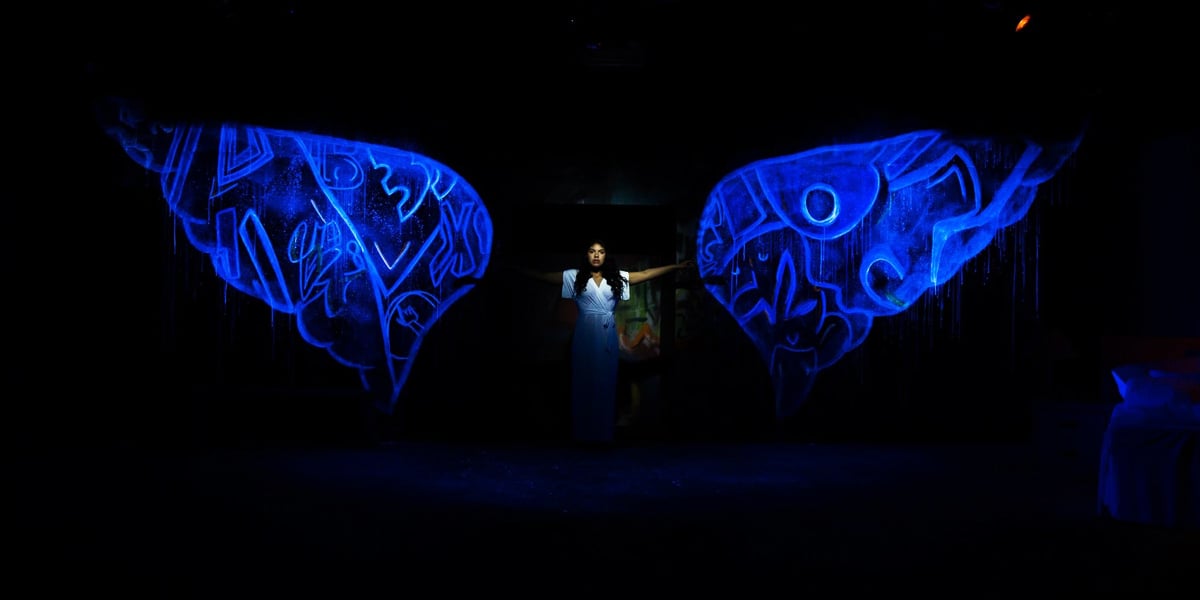
In order for the ultraviolet paint illusion to be successful, we needed a powerful UV light source dedicated to the effect. Fortunately, we were able to secure a pair of Rosco Miro Cube UV365 LED fixtures - one fixture was dedicated to each wing. These were the same fixtures I had seen Jenny Knott use to demonstrate the UV effects in a SWUSITT UV workshop, so I knew they were what we needed.
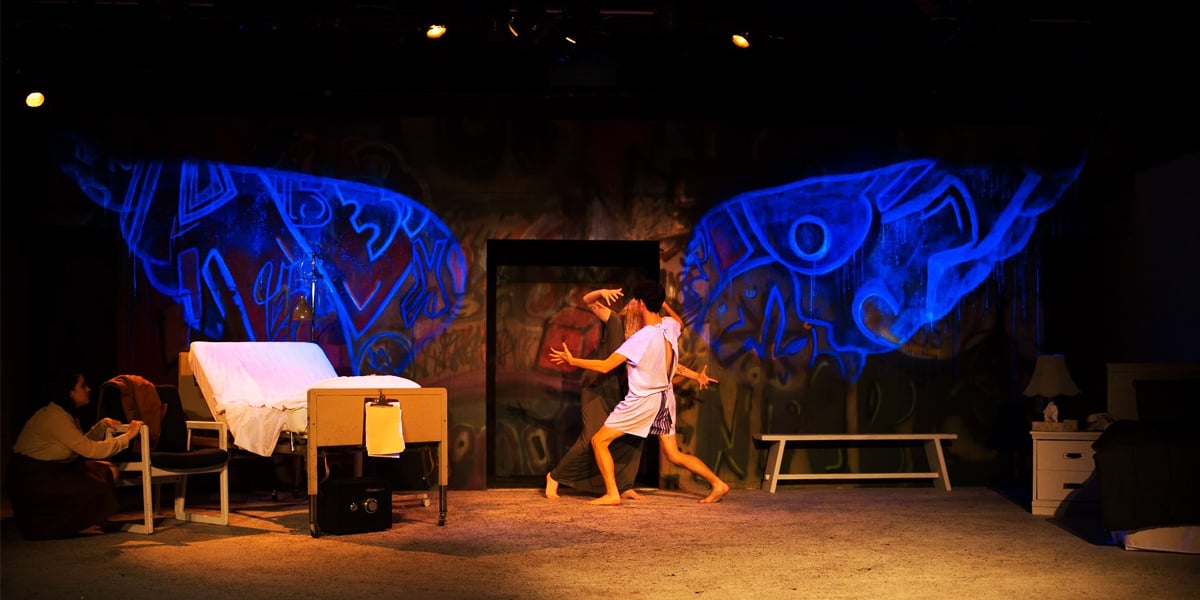
The Miro Cube UV365 fixture emits a strong UV light that doesn’t have the purple glow of cheaper products, which indicates the presence of some of the visible spectrum. Because they were LED, they also easily dimmed out when the UV effect wasn’t needed.
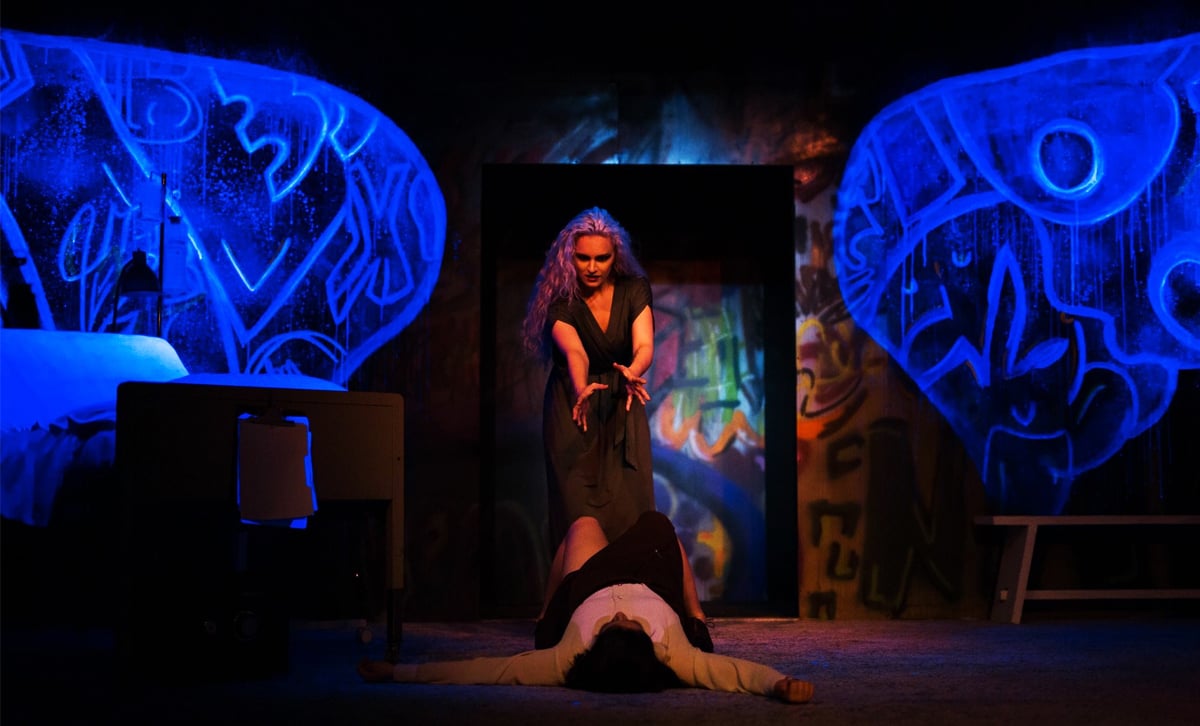
This project provided me with an understanding of ultraviolet paint, ultraviolet light and how to use them together to enhance a production. I look forward to the next UV project where I can apply this knowledge and continue to learn about the unique characteristics of ultraviolet paint.
You can view more of Jenn Bobo's work as is a scenic artist at JBbdesigner.com, or follow Jenn on Instagram: @JBbdesigns. If you’d like to learn more about the UV products used in University of Oklahoma’s production of “Angels In America,” you can visit the Rosco Fluorescent Paint – the VividFX – and the Miro Cube UV365 product pages on our website.
Photography by Jenn Bobo and Emil Jraissati

