

Jamie Clausius is both the resident Designer and Scenic Artist for backdrop designs at Tobins Lake Studios. Recently, she needed to create a generic cornfield backdrop design for their rental stock of drops that would be useful for such shows as “The Wizard of Oz” and “Oklahoma!” This drop made Jamie step out of her comfort zone a little bit and remember that some of the best scenic tools are the ones that you invent yourself. This post - originally published in the Guild of Scenic Artists' blog - shares the techniques and the tools that she rediscovered on that project.
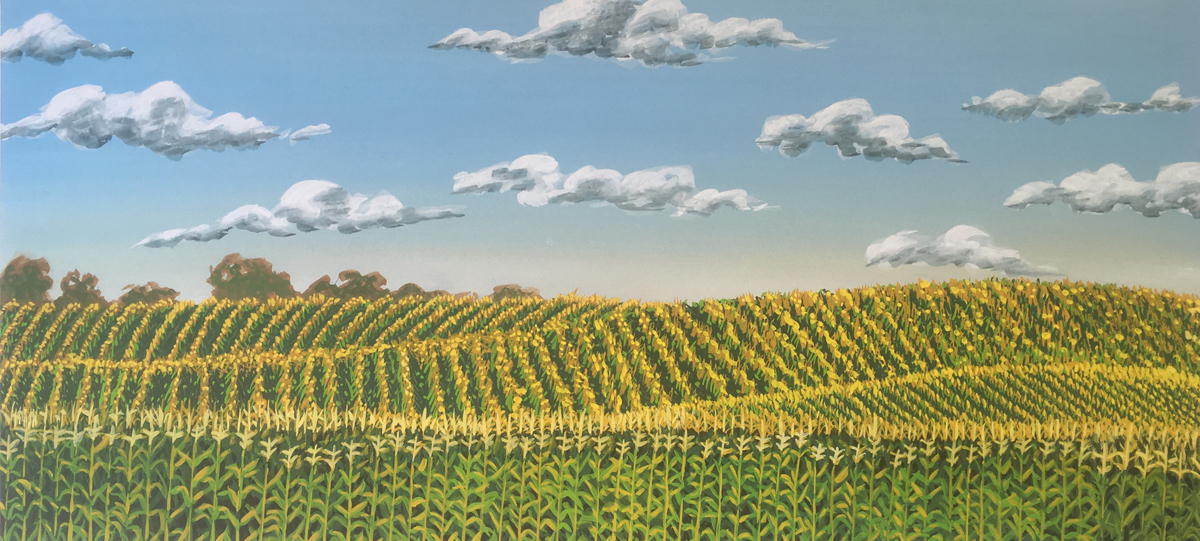 Rendering of Backdrop #810 – Cornfield for Tobins Lake Studios. Designed & painted by Jamie Clausius.
After I worked out the design for this particular drop, the question of materials and tools became imperative to solve. As with many scenic art projects, a large portion of this project would be repetitive and needed a consistent process for painting the backdrop. When I’m looking for solutions to a problem, I often go back to the basics of scenic painting and my introduction to the new and interesting tools I learned there: funky brushes cut by hand; sponges, rollers, stamps, etc.
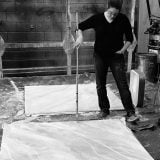
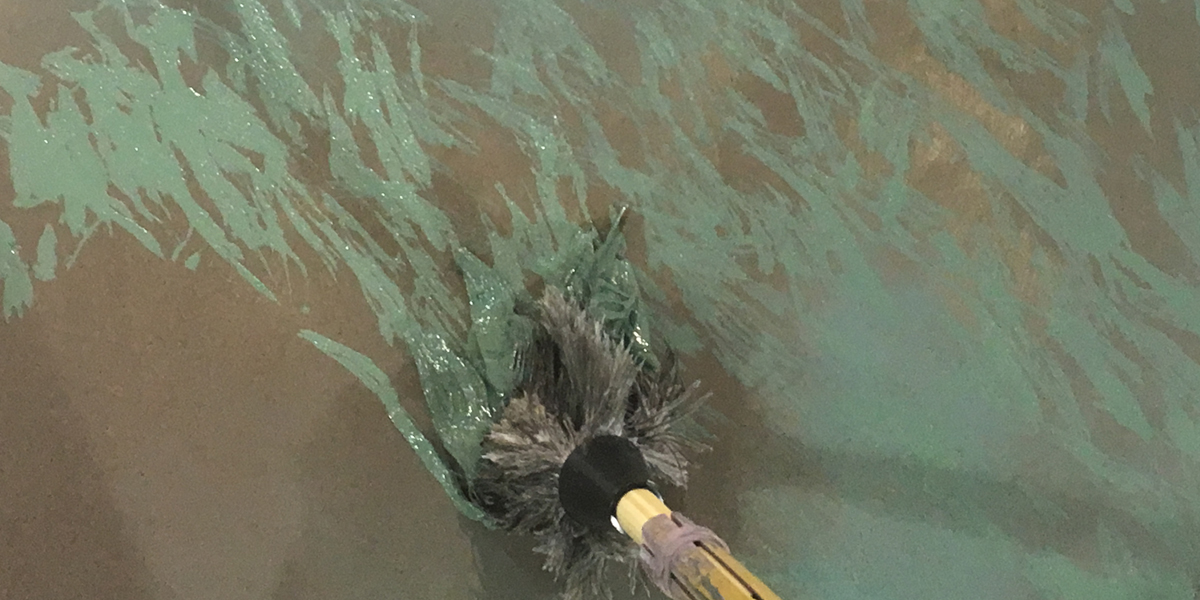 Schlepitchka – painting with a feather duster on the end of a bamboo stick
For this design, I needed to find a tool that would make the marks I needed as efficient (FAST) as possible. Ideas of stamps and rollers were always on the table, but working with organic shapes in human-made rows meant the tools needed to be versatile while still controllable. I admit, I have had very little success with the process of schlepitchka (flogging with a feather duster) style of painting in the past; but I decided to leave no stone unturned, and it turned out to be my answer!
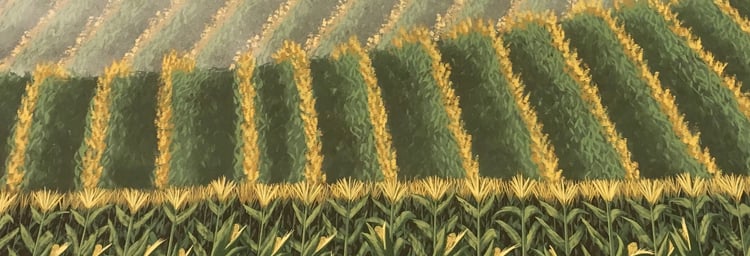
 Schlepitchka corn rows
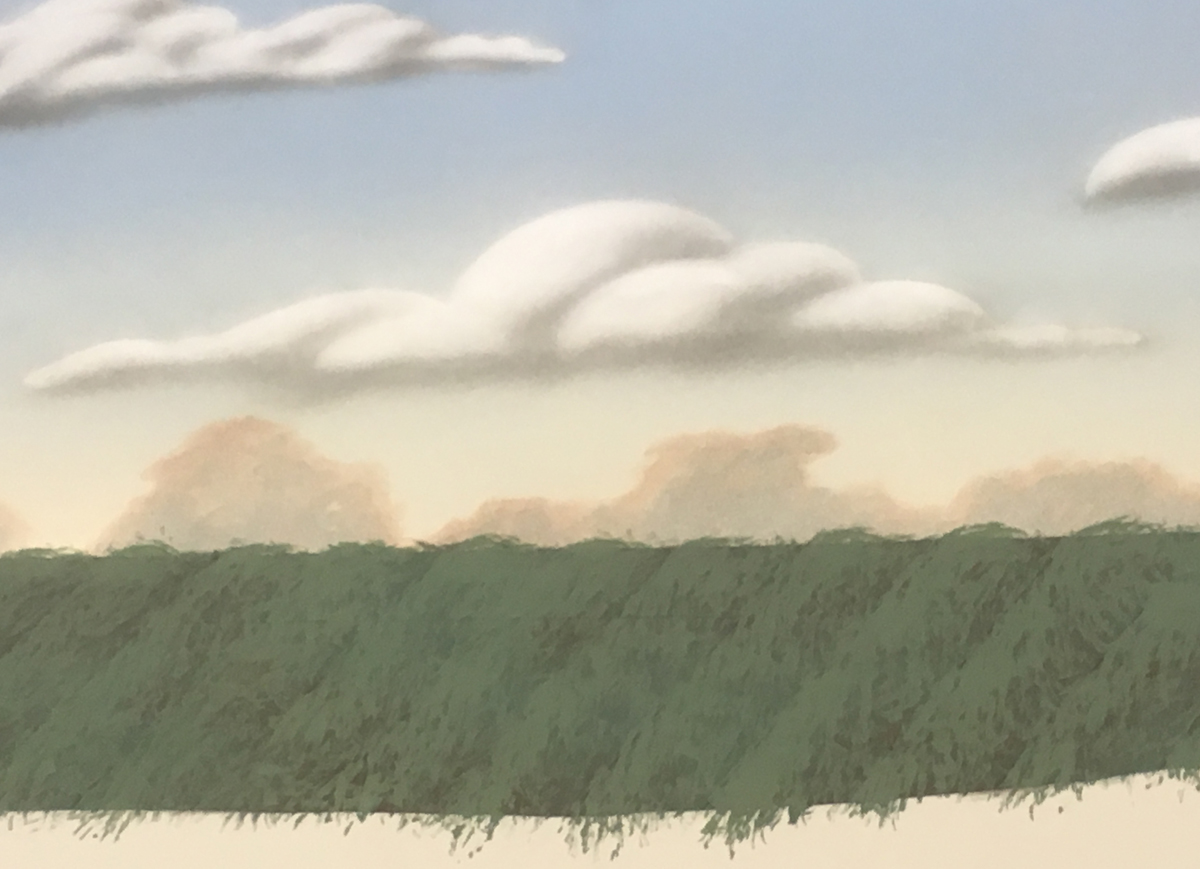
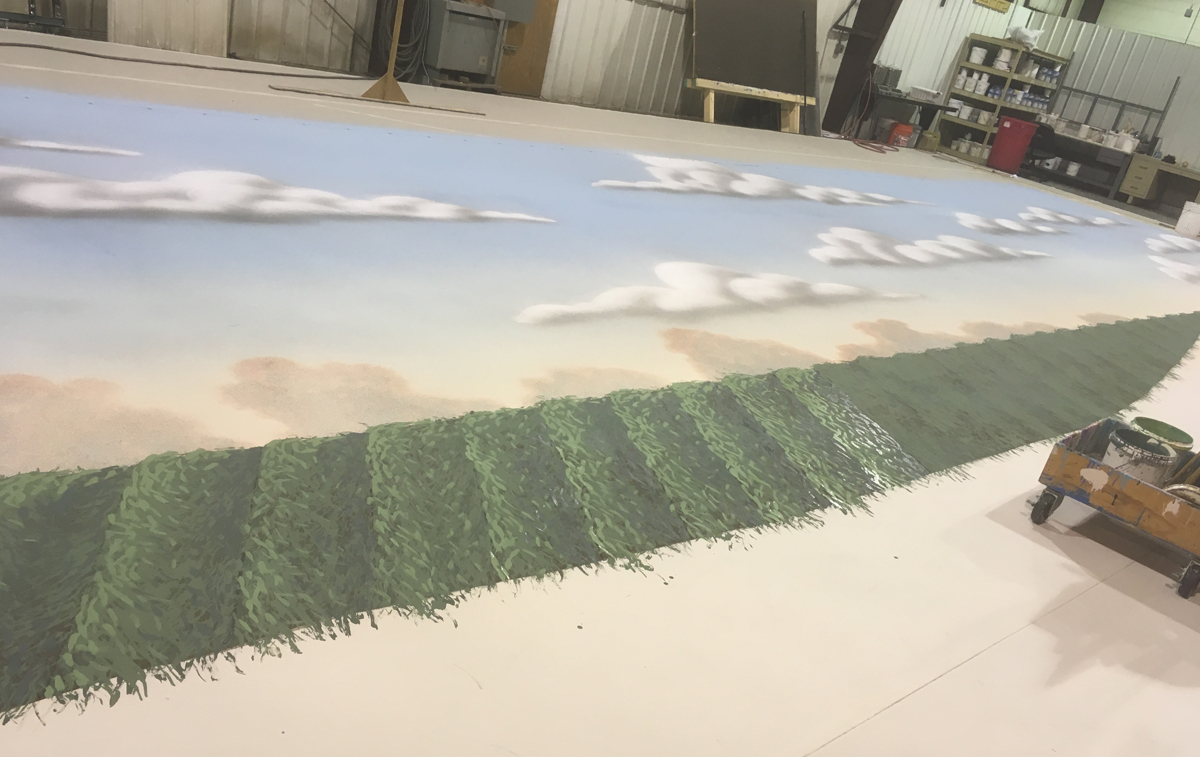
A quick trip to Walmart for two generic, small feather dusters was all I needed to start playing around. I started with a scumbled layer of Rosco Off Broadway Burnt Umber and Chrome Oxide Green as the base for each section of cornfield. I mixed several greenish colors to represent the darkest to lightest tones within the foliage of the corn rows. Using a medium green color, I started to directionally drag the feather duster within each ‘row’ – eventually creating a general look of leaves far off in the distance to build our corn rows upon. The feather duster could be maneuvered to have the effect of stray leaves, but not obliterate the scumble behind it. If you cover up the whole previous step, why do it?
 Fitches helped create highlight and shadow foliage
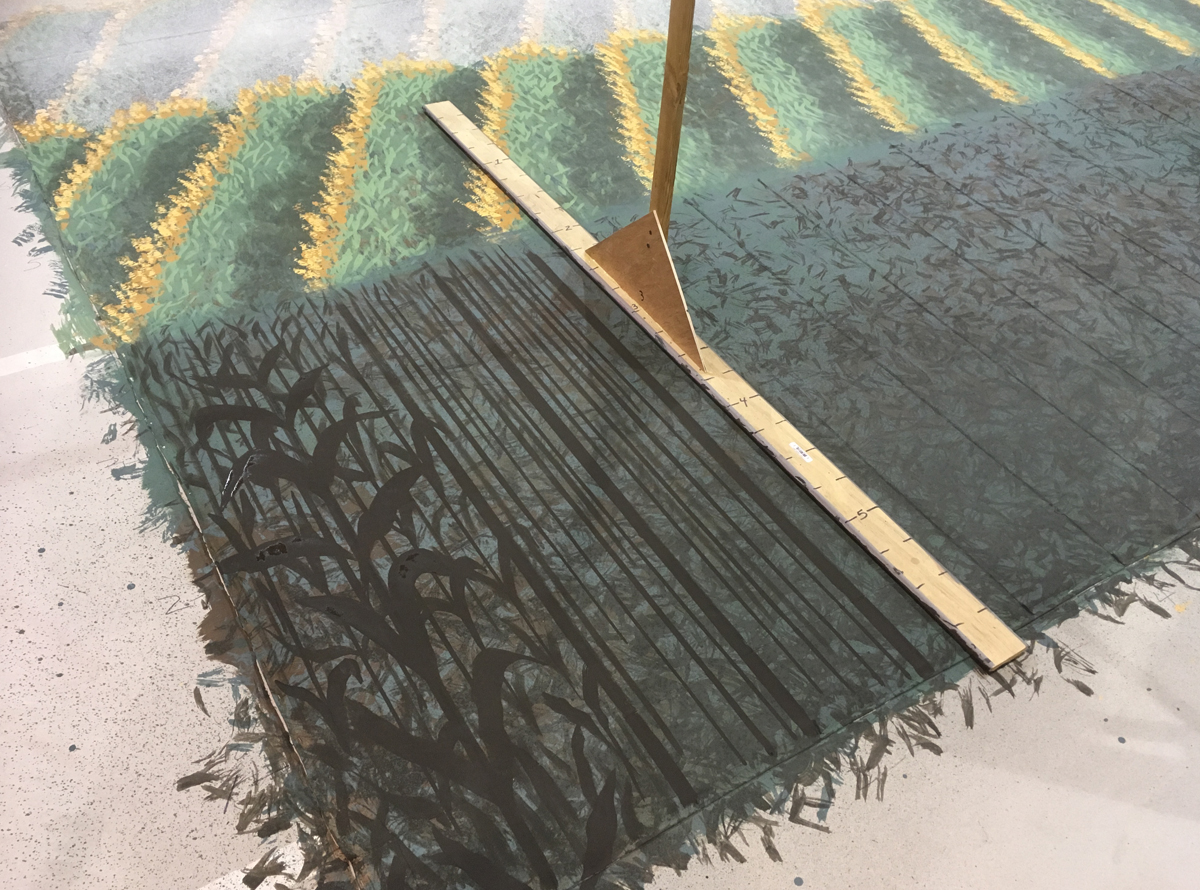
From that point fitch liners were used to dot in highlights and shadows. The final touch on the background corn rows utilized a small sponge roller I found at Lowe’s that’s used to put a sponge texture into the corners of walls and ceilings. We used it to paint in the corn row ‘silk.’ As the cornfield moved closer to the foreground, marks had to get larger and more defined within the picture plane.
 Corn stalks, leaves and corn cobs were laid in on top of a feather dusted background.
The final, and most intense, part of the backdrop was the bottom row. Not only did a sense of leafy darkness have to be present, but individual corn stalks needed to be articulated across the entire bottom of the backdrop. The trusty feather duster had come into play once again as another scumble of the brown and green colors were laid down with a more generalized ‘ploppy’ look. Since this row was face on to the viewer, directionality of the background rows was not a concern, but more about giving a sense of dense leaves and foliage. Two different colors of feather duster were laid down, one with the same medium tone green, and another in a very dark, umber-black color to give the look of shadowy leaves peeking through the rows. Some of the background rows were put in with a combination of fitches and angled sash brushes. From that point on, general marks would not be enough – fully articulated corn stalks with highlights and shadows were needed. A lot of time was saved by using the schlepitchka and roller techniques.
 Another time saver!
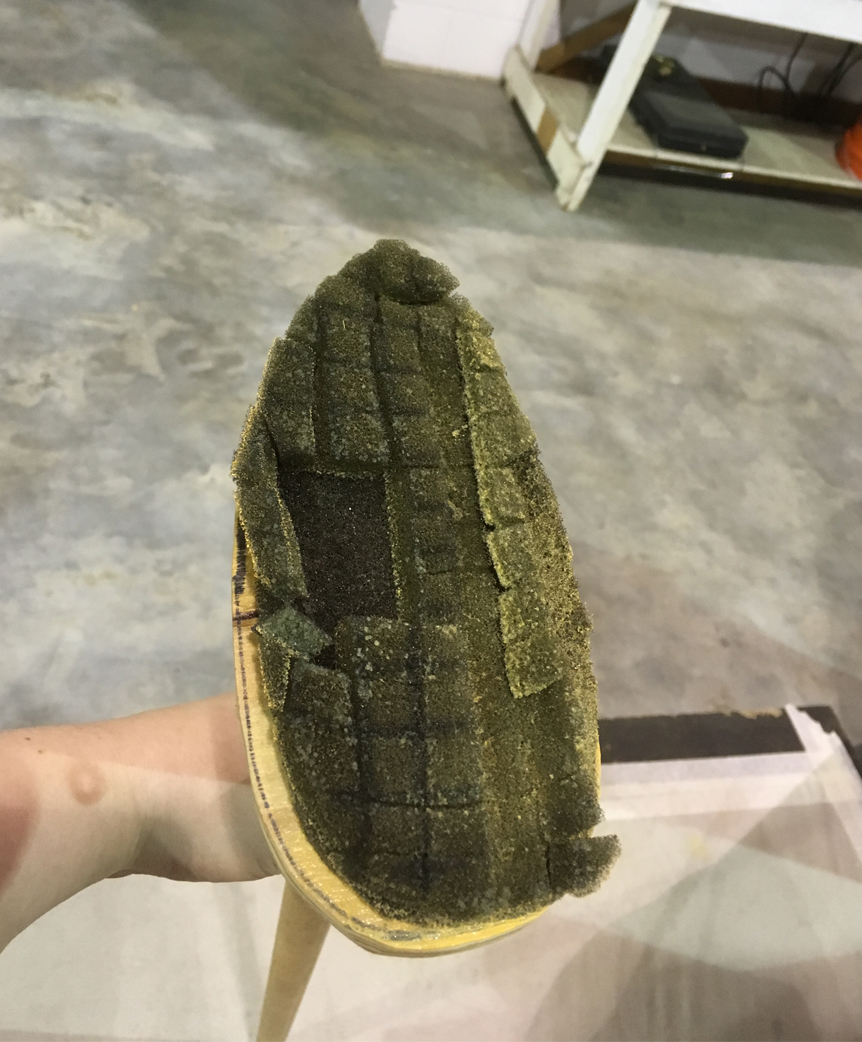
Yet one more tool would be employed in this final row. I made a foam stamp of an opened corn cob, and stamped it along the stalks alternating sides and angles to give a more natural ‘hanging off the stalk’ look. Research revealed there are no more than 3-4 cobs on any given stalk. Multiply that by the number of stalks painted, and almost 200 corn cobs were stamped in the matter of 30 minutes!!
One thing that is common with foam stamps is quick deterioration; the stamp had been scored to give the illusion of individual corn kernels. About 2/3 of the way down the field the stamp started to lose part of its ‘kernels,’ but not to fear! That also adds to the realism of individual corn cobs.
Adding corn husks helped to individualize the cobs, and silks would still need to be painted individually, but the addition of this custom-made tool helped move our process along considerably.
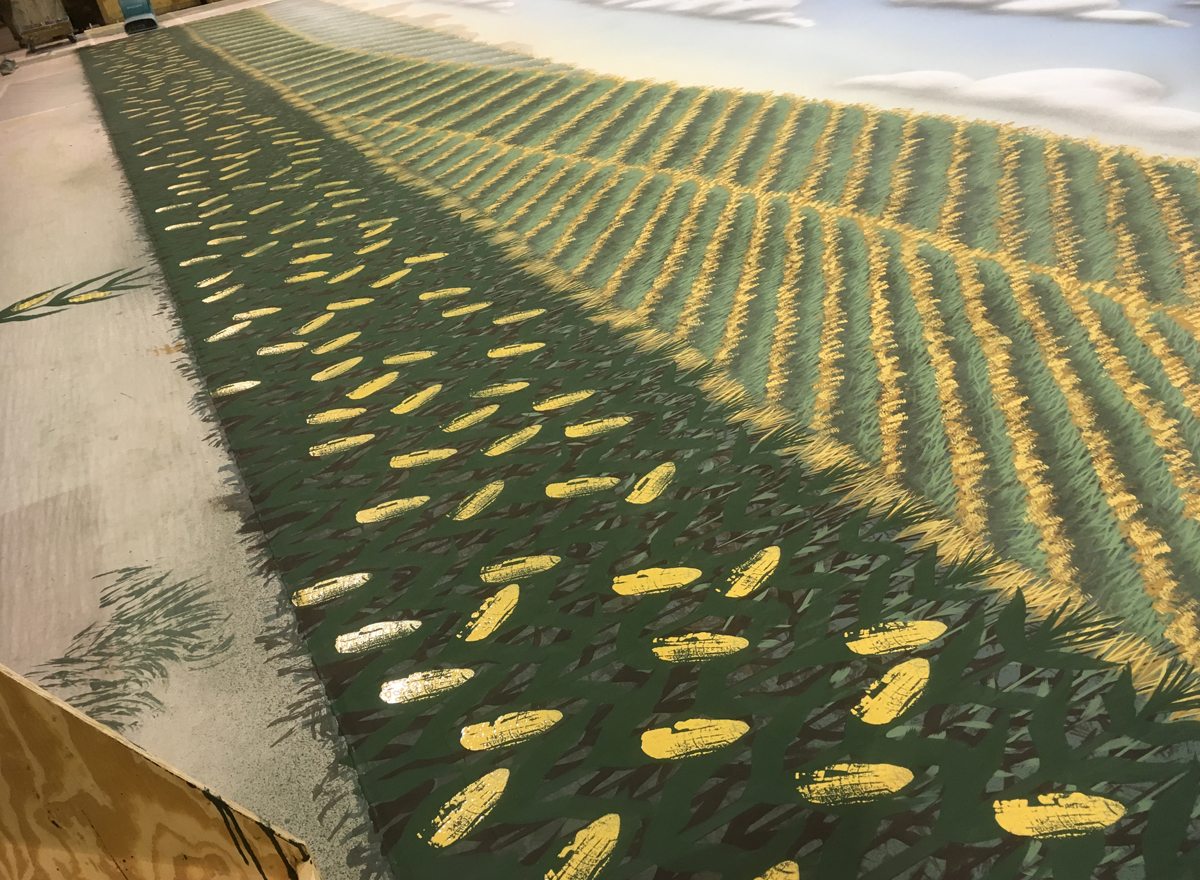 Corn cobs stamped along the stalks
The industry will always dictate a need for time-saving and rapid production. It took a lot more than just brushes to complete this backdrop on-time. When it was all said-and-done, sponge rollers, stamps and feather dusters were all used to help create our cornfield. Thankfully, being a scenic artist brings about a sense of curiosity and the need for problem solving.
 Backdrop #810 – Cornfield – Available to rent at Tobins Lake Studios
Although the job of a scenic artist can be repetitive, there are many ways to achieve a process - which helps keep the job exciting and ever-challenging. I will need to recreate this drop at least one more time to satisfy the many rental customers of Tobins Lake Studios. That means I get the chance to refine this process throughout each new backdrop, and be happy for the nice bits of painting that come along!
 Jamie Clausius has been the Resident Scenic Artist and Backdrop Designer for Tobins Lake Studios in Coleman, Michigan since June of 2014. Jamie trained and earned her certificate at Cobalt Studios Scenic Artist Training Program. Some of her other credits are Scenic Charge Artist at Lexington Children’s Theatre, and Children’s Theatre of Madison. To see more of her work, visit her website: jamieclausius.carbonmade.com. To learn more about the scenic paints Jamie used in this project – explore the Rosco Off Broadway webpage.
Angelique Powers October 12, 2017 Questions?
Guest Author Angelique Powers has an MFA in Scenic Art Design from the California Institute of the Arts and has been professionally painting theatrical scenery for over 25 years. A Founding Member of The Guild of Scenic Artists, Angelique also shares her knowledge, passion and experience with her students at the University of Minnesota as a scenic paint instructor. To see Angelique’s work, be sure to explore the portfolio on her website – Qpowers.com.