

Jay P. Morgan from The Slanted Lens recently worked on two photo shoots where he used fog and haze as a lighting tool. As always, Jay P. turned his experience into two excellent photography tutorials. Below are five of the main takeaways that explain how to use Fog and Haze as a lighting tool to enhance your images.
 Visible light in the shot can set the mood or tone of a shot. Whether it’s smoke, dust, fog, or something else in the atmosphere, light has to have something to bounce off in order to be seen by the camera. The easiest way to create and maintain atmosphere on set is to either use a hazer or a theatrical fog machine. Jay P. loves the Rosco fog & haze machines because they make it easy to control the atmosphere on set.
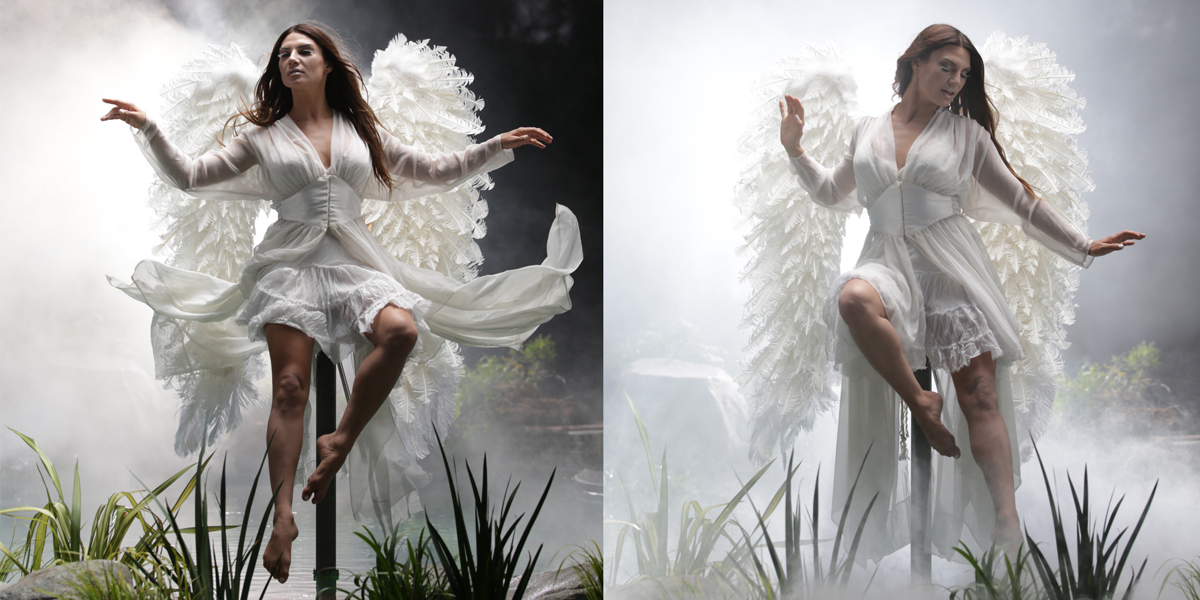
The more fog you pour on set, the more light it reflects – leaving you with less density in your shadows. Compare these two angel photos, for example. The image on the right has more fog around the model. That fog is reflecting the light, making the area around the model more luminous, which, according to Jay P., “opened her up and made her a lot brighter.” The shot on the left has less fog, making the area around the model darker and the image feel a little denser with heavier shadows. Both images work - but knowing how to use the fog/haze as a lighting tool will help you achieve your desired contrast more predictably.
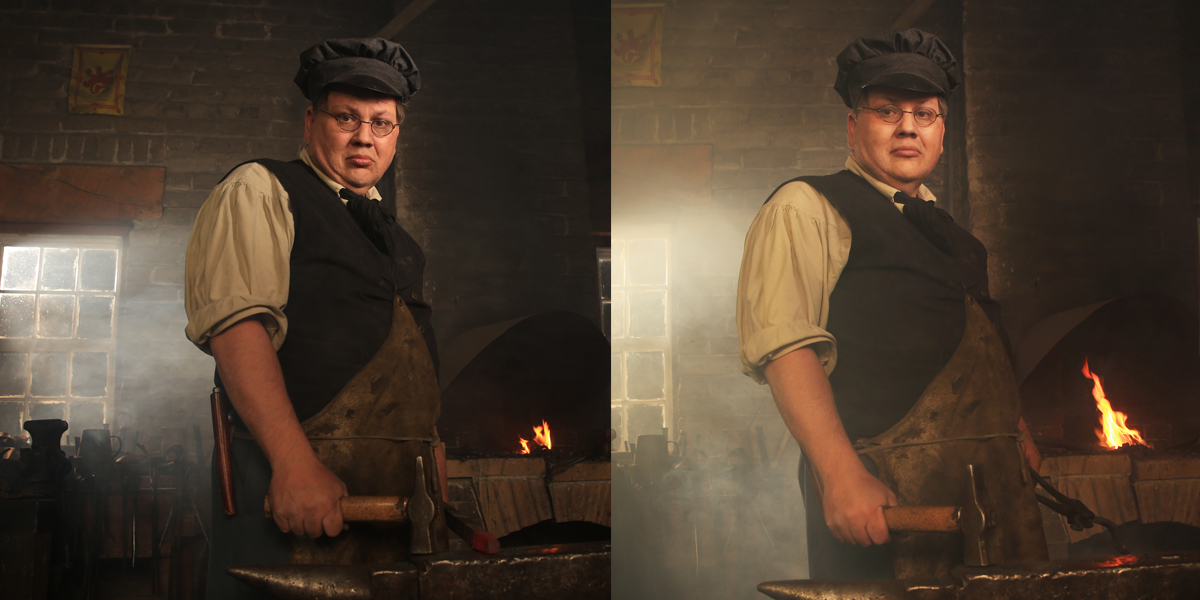 In order for the camera to see shafts of light, you need to set them at the proper angle. According to Jay P., the best way to create shafts of light in a shot is “to move your background lights in and aim them back towards the camera.” He recommends aiming the light back towards the camera at a 45° angle from behind the subject. “If you’re struggling to see your shaft of light, move your light closer to your subject matter, aim it back towards the camera, and your shaft will reveal itself.” You can achieve this by moving your lights in and aim them back towards the camera.
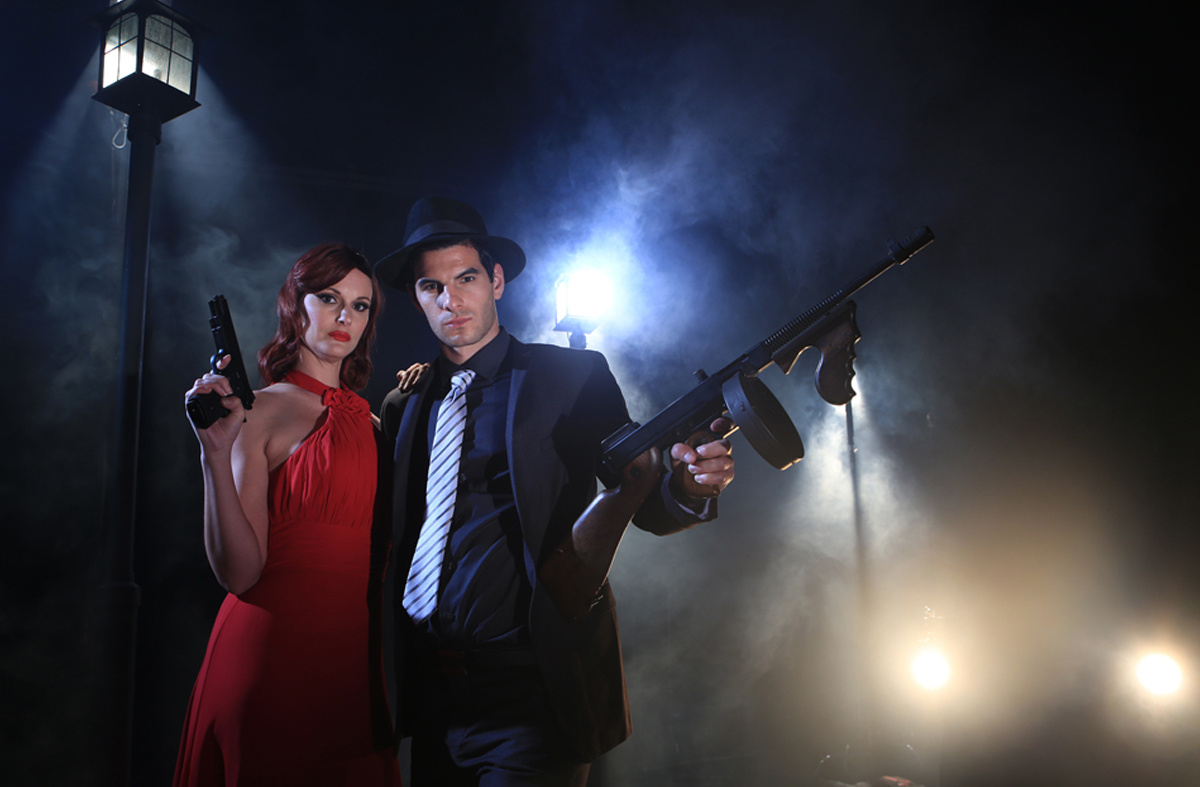 Whether you're looking for a straight beam or a soft feathery haze, the quality of light will affect the outcome of your shot. Choosing the right fixture in the first place and knowing how to modify the lights you've got are both very important. Jay P. likes to use focusable continuous lights such as ETC Source Fours or fresnels to create tight beams of light in his shots. He notes that "it’s much more difficult to create this effect with strobes. You’ve got a reflector on the strobe, which bounces light all over the place." If you don't have access to continuous lights, you can put a grid or a snoot on your strobe, but you risk losing output. Using these techniques to manipulate the quality of light can drastically alter the atmosphere of your shot.
 Shaping the light allows you to give the beam texture in your shot. Sometimes this can be easily achieved by using objects in your surroundings, such as windows, open doorways or tree branches - all of which can add texturizing shadows into the beam of your light. If these objects aren't present in your surroundings, explore making a snoot or cucoloris (aka cookie) using Rosco Cinefoil. Better yet, if you're already using ETC Source 4's in your shot - explore Rosco's extensive catalog of Gobos. Using any of these items to break up and shape your light will create texture within the beam and give you much more interesting shafts of light for your shot.
Jay P. Morgan’s The Slanted Lens always has great lighting tips you can immediately use in your next photo or video shoot. To learn more about the products Jay P. uses to create the atmospheric effects in his work visit our Vapour Fog & Haze Machine web page. Be sure to watch both of the full tutorials that inspired today’s blog post below:
Chanda Goldsworthy September 15, 2016 Questions?