


Felix Barjou is a French photographer that grew up in the world of advertising with graphic designers for parents. He started his photography career in 2008 with simple portraits, and immediately discovered his style and process. Felix is passionate about light, which presents itself in his portraits that contain stylized illumination and a touch of humor. After receiving his Rosco Photo Lighting Gel Kit, Felix posted his thoughts on how to use it on his blog, which was originally posted in French. He graciously translated the post into English for us to share here on Rosco Spectrum.
I recently received Rosco's new Photo Lighting Filter Kit a week ago, and after a few tests I can say I really love all of the awesome colors inside.
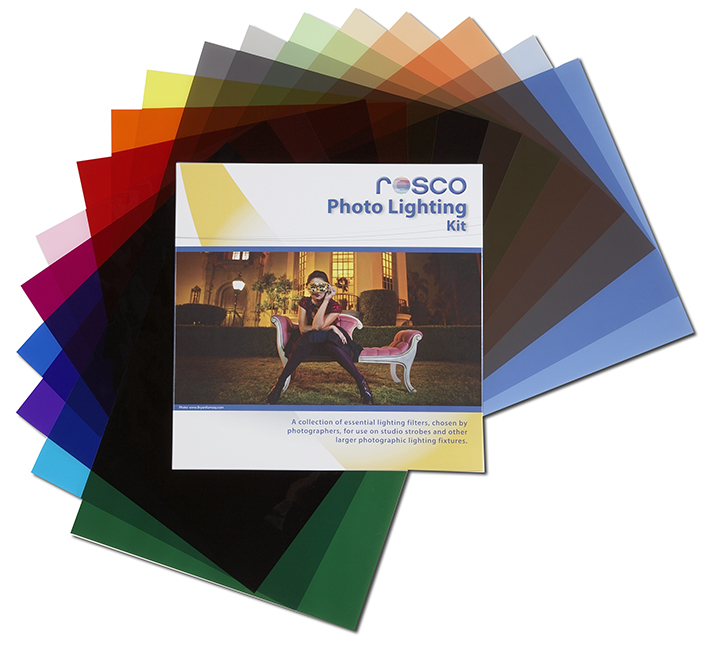
Let’s do a quick presentation. The kit includes twenty, 12" square sheets of filter with color corrections (CTO,CTB,ND) and other different colors - all contained in a well protected, resealable package.
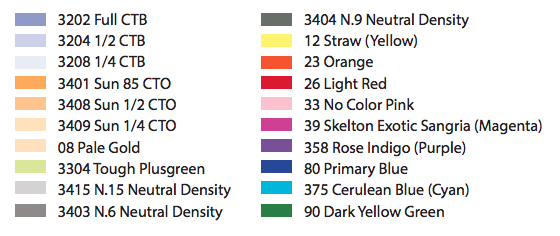 I first tested every gel on the skin so I could see what the colors rendered.
 (Thanks to Morgane for her patience)
After playing for half an hour, gaff taping different gels onto my reflector dish, I started to work on my first image.
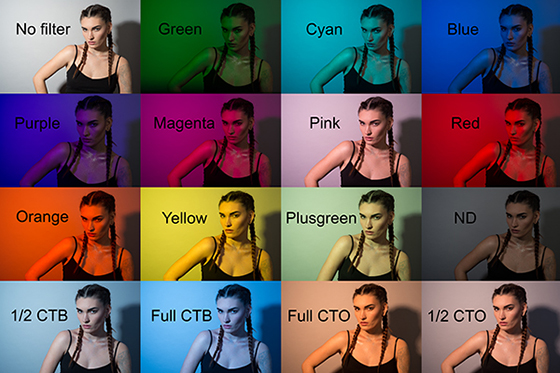
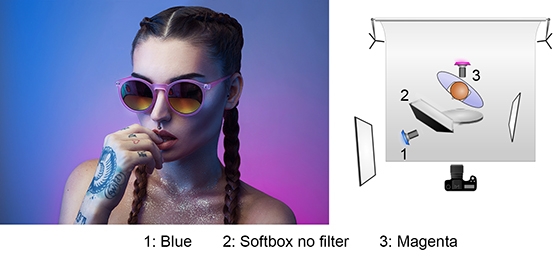 Since I had a very small room to work in, I stuck to a simple portrait using 3 light sources, one reflector and two gels: one blue and one magenta. The blue filter was aimed directly at a white wall to project the light in a very diffused way all over the room. The magenta was taped onto a reflector dish with a grid, just behind the model for a slight touch of color on the background. The 3rd source had a square 70cm softbox without any gels, and a reflector just under to soften the shadows.
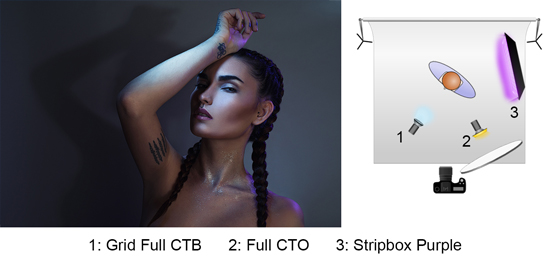 The second test with Morgane helped me understand color correction better using the CTO and CTB gels. The CTB filter was placed on a reflector dish with a grid for a very focused light. The CTO was oriented towards a white reflector for a soft and diffused light, so the skin could have an orange under tone. And finally the purple was placed in a 135x30 Phottix Stripbox for a touch of color and a cold mood.
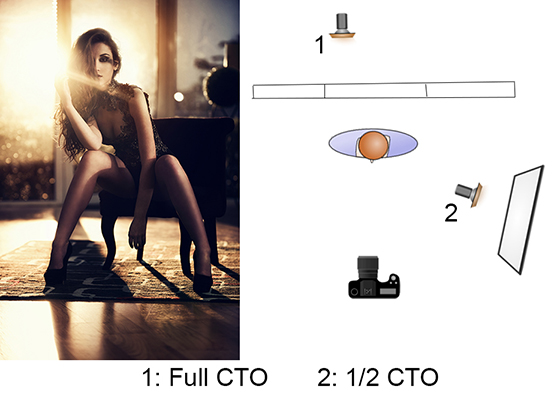 For this image I ventured outside the studio and used the CTO to recreate a sunset. Since there was no sun that day, I figured I could create a nice sunset with a flash and a reflector dish. I placed my flash outside and another to my right so it could bounce on the wall. The CTO can reproduce the temperature of a sunset really well and allows for a lot of possibilities.
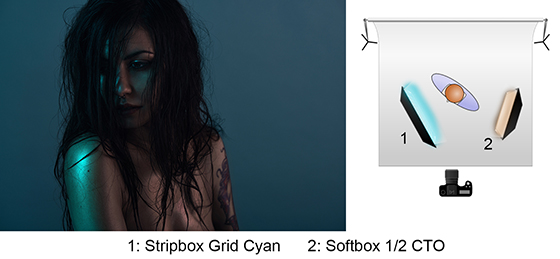 Let's move to my favorite gel, the Cyan! I really love this color, it gives a dark and cold mood that is really nice. The mix with the CTO is perfect to me. For this image I installed a Stripbox at 45° with the cyan, and a square softbox with a 1/2 CTO filter.
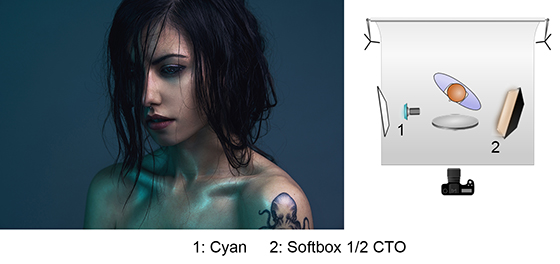 Using the same colors but a different lightning we can have a soft render, here the cyan reflects on a white wall and a reflector is added under the model.
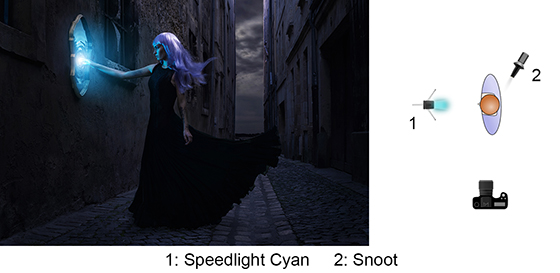 Here there’s a somewhat fairy image with the use of only one cyan gel on a speedlight. This image was not easy to achieve, but here the gel is very important because without it, the image would lose a lot of its meaning. Just like the CTO seen above, the gels allow me to create a mood by lighting the model or not.
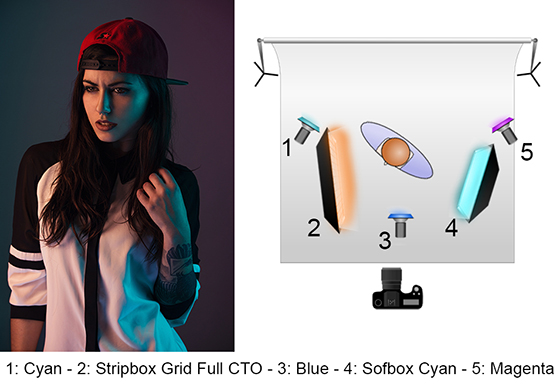 Using five light sources - each of them with some gels.
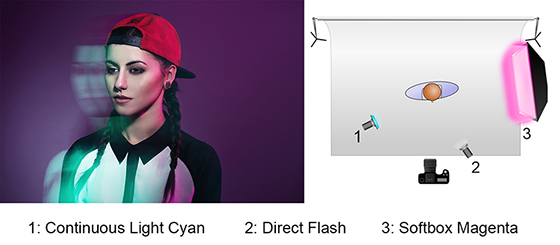 Here is my final technique with the filters - the long exposure! In this shot, the cyan was used on a continuous light, while the other two were used in a classic way. The technique is to shoot at a low speed to have this movement effect and allow the other flashes to freeze the motion (first or second curtain). I used a speed of 1/2s and an aperture of F/11 with a camera movement during the exposure time.
I really hope you enjoyed this post and that it will make you want to try all these colors in your photos. I took great pleasure in mixing all of these colors and, I have to say that this essential and fabulous kit should always be in your camera bag - whether it’s for portraits, studio or outside staging.
Bonus : Here are two Speed Retouching video of two images I shot for this article.
To see more of Felix Barjou’s work, including his portfolio, product reviews and additional photo tutorials, visit his website: www.felixbarjou.com.
Frank Lambrechts July 08, 2015 Questions?