


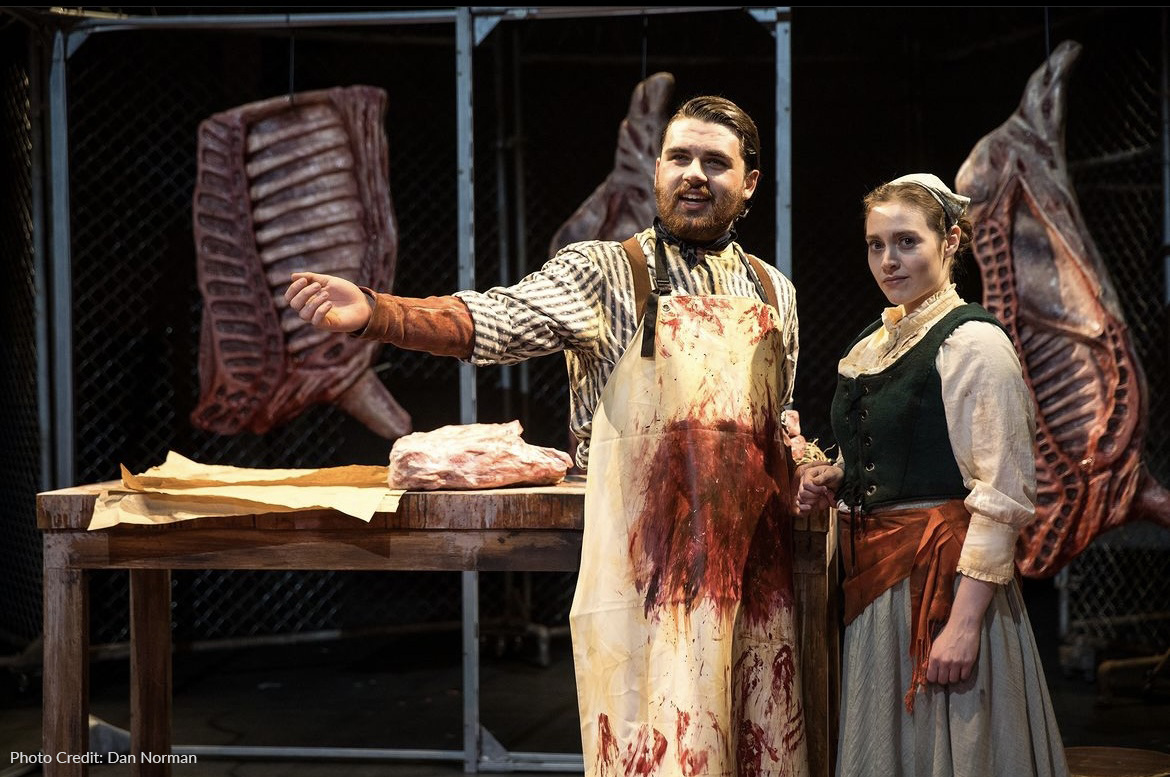
I recently had the opportunity to work on the University of Minnesota Dept of Theatre and Dance production of Fucking A by Susan Lori Parks, which was directed by Talvin Wilks. At one point, the script specifically calls for: “Butcher’s place. Meat hanging around on meat hooks. Butcher at his butcher’s block hacking away at a piece of meat.” Not the most descriptive thing to go off of, so Props Coordinator Ursula Bowden and Scenic Designer Jeni O'Malley got to work discussing the needs and looks of these pieces, and then handed them off to MFA Scenic Design Student Jacelyn Stewart to create and execute the props and needed effects. I joined the team as a technical advisor to help Jacey choose which products to work with, and below are the three fake meat prop projects she created.
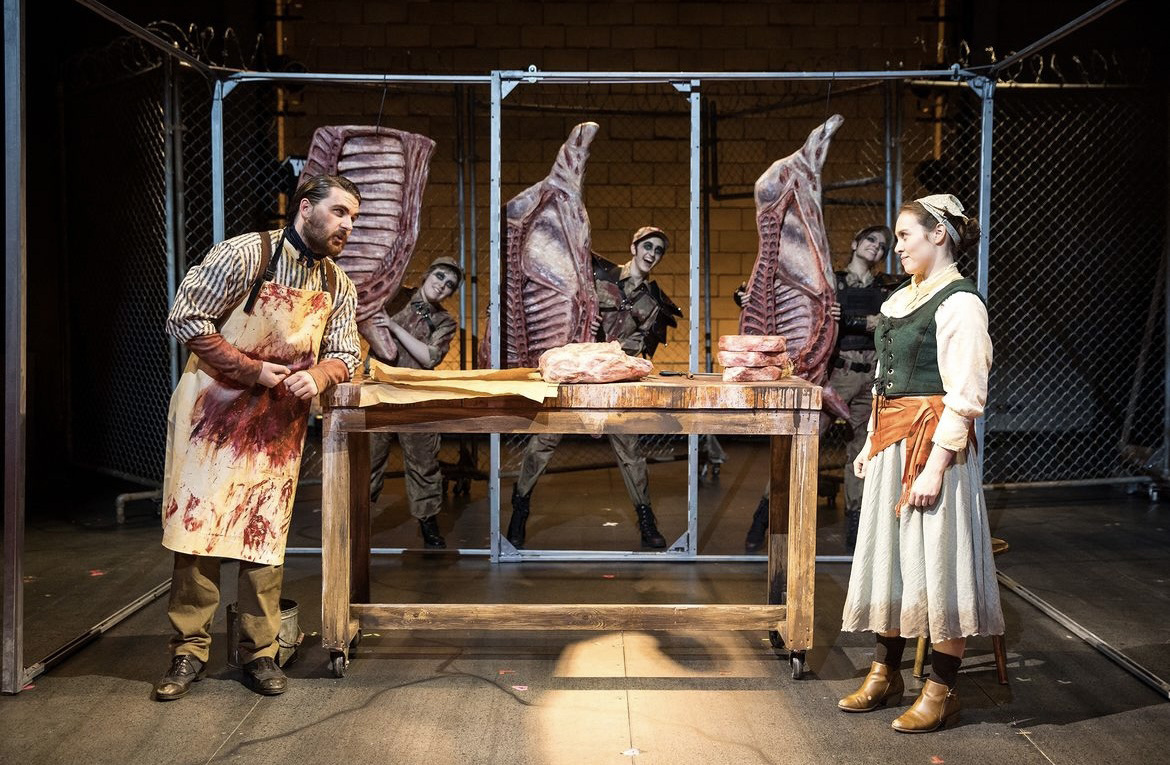
Goal: Create Three lightweight and life-sized slabs of beef from foam that will hang from a piece of Unistrut and then be picked up and danced with by the actors.
One question I get asked a lot is: “How do you make stage prop food?” The answer, more times than not, is foam. In this case, we made our fake meat props out of 2” Pink Insulation Foam. We didn’t have enough large foam pieces on hand, but we did have a lot of scraps from previous projects around. So, Jacey started laminating the scrap pieces together with Rosco FlexBond™ to create the large sizes of foam that were needed for this project. Most people don't think of using FlexBond for this purpose and tend to use more industrial products like Liquid Nails - but we’ve been using it for years. It glues foam to foam and foam to wood quite well (and does it faster!) with the ability to clean up with water rather than nasty solvents.
Application note from Jacey: Use paint rollers to apply thin coats of FlexBond to both surfaces and then put them together. A small amount of weight on top while drying is also helpful.
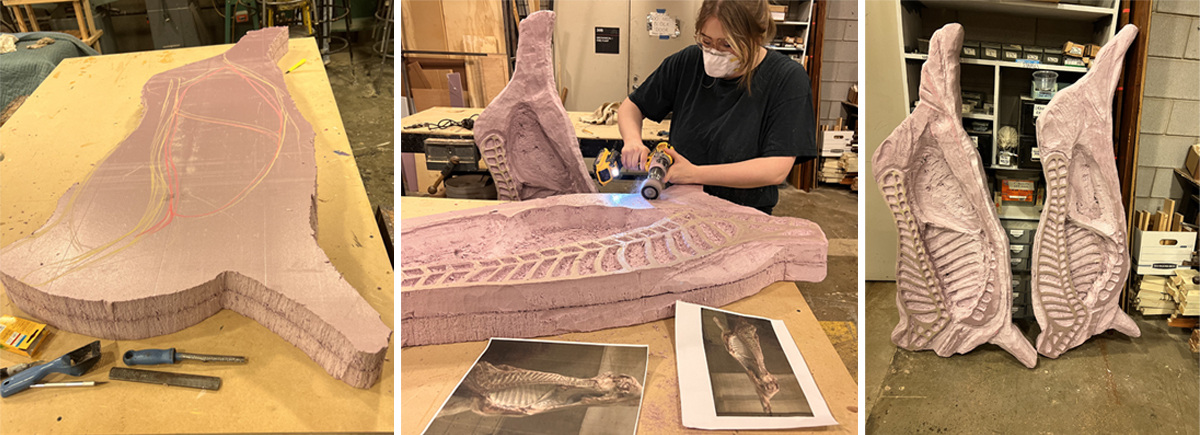
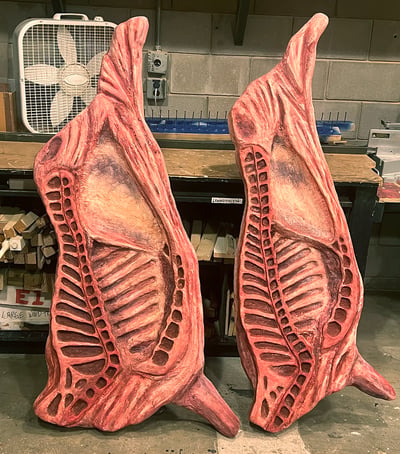
After using a jigsaw and bandsaw to cut out the silhouette of the beef, Jacey went to town with smaller knives, rasps, and power sanders to create the belly cavity, rib and vertebrae bones, and leg section with a focus on creating the correct anatomy.
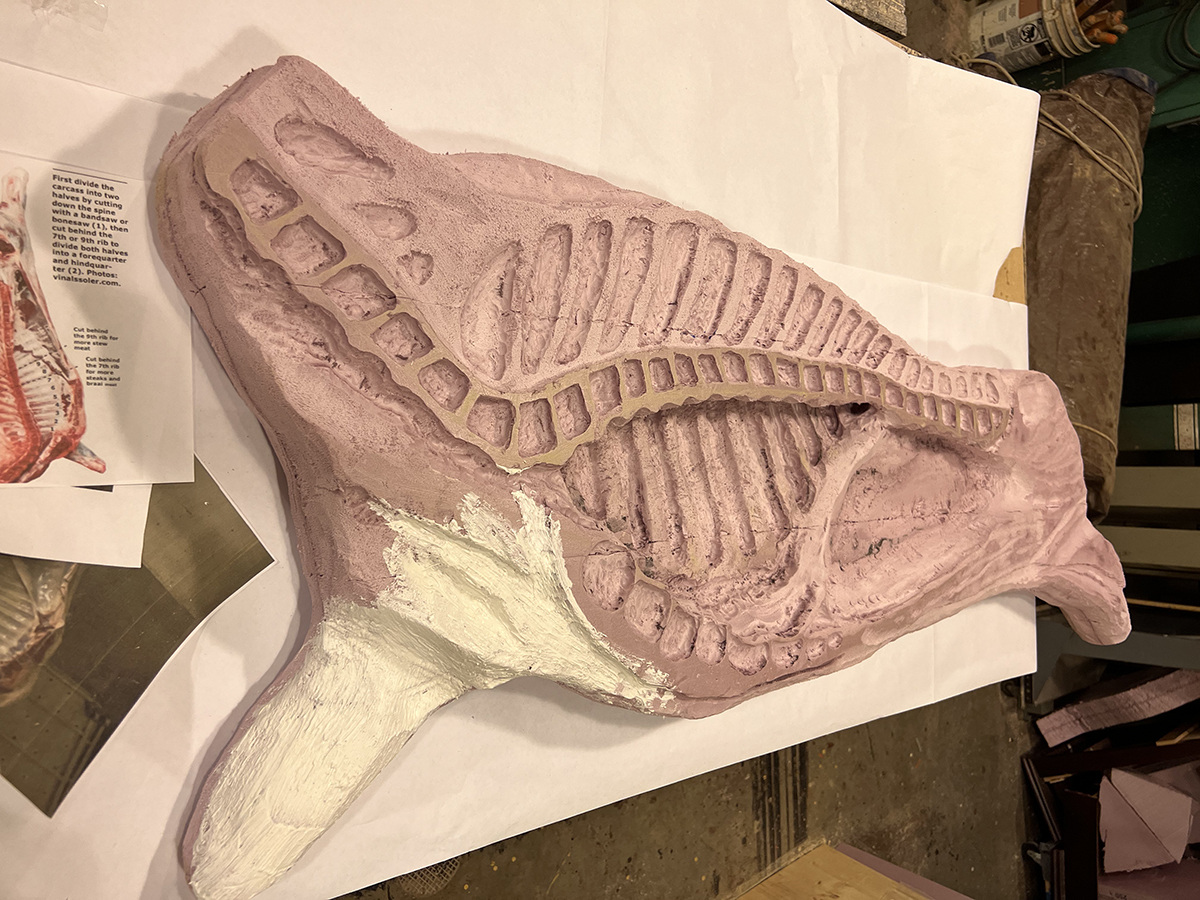
The next step was coating the foam so that it could withstand the abuse it might receive from the crew and dancing actors. This was a great opportunity to use Rosco FoamCoat™. One – because of its durability, but two – because of the different effects she could get with one product. Using a chip brush to apply a healthy coat of FoamCoat created an organic muscle-like texture. But, because it dries hard, she could also sand sections of the slab smooth to create contrast and believability.
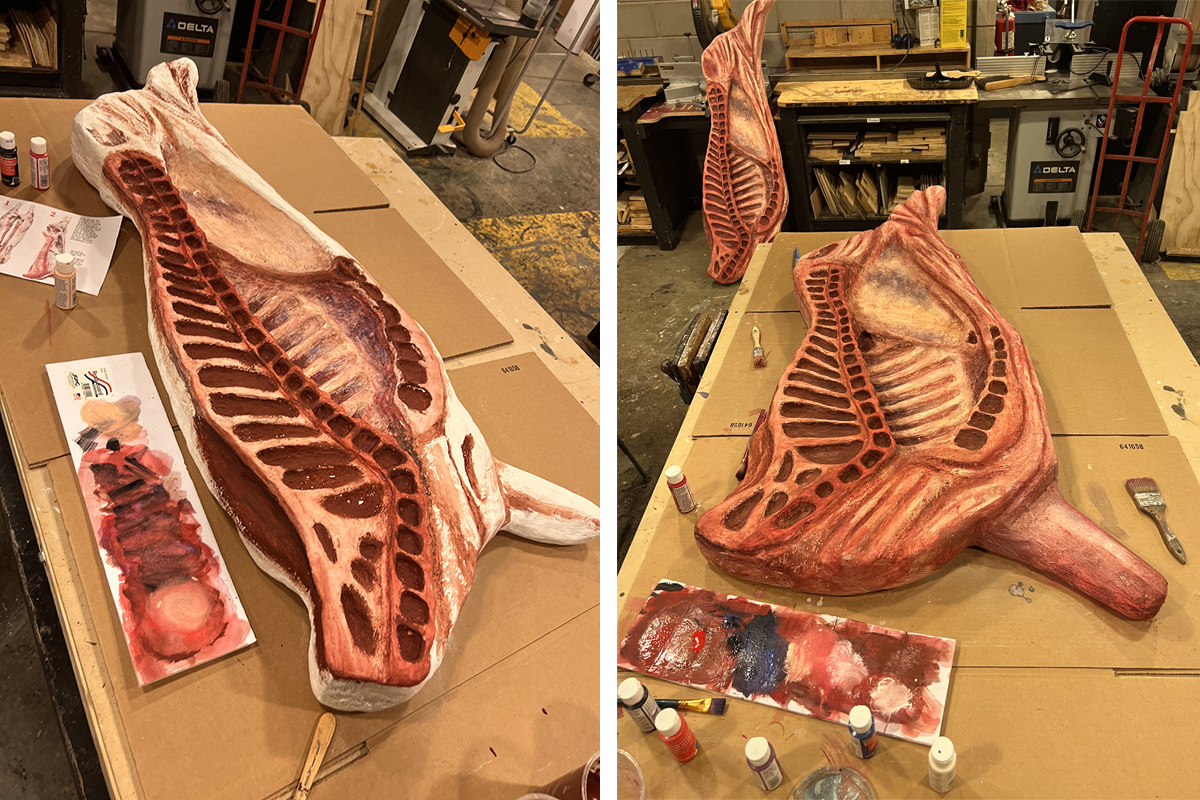
Now we were ready to paint. Surprisingly, Rosco Off Broadway Burnt Sienna turned out to be the perfect shade of red for the basecoat of our fake raw meat. We used it opaque for the deepest parts, and as a wash over the muscles. Further experimentation and palleting with craft paint colors like yellows, bright red, purples, and blues provided details, depth, and bruising.
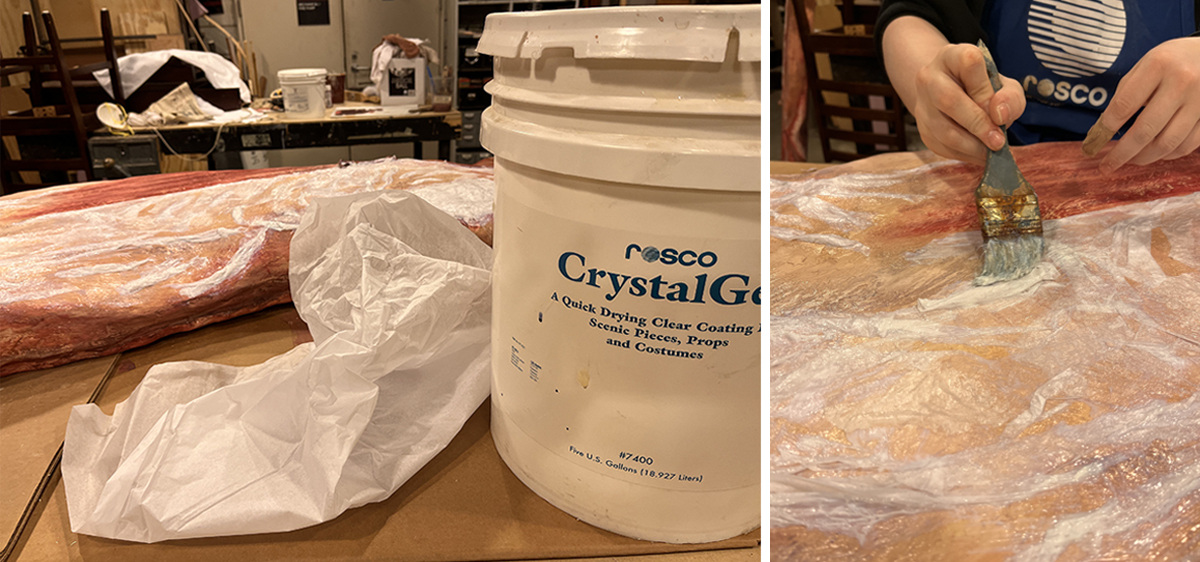
If FoamCoat protects the foam; what protects the paint? Rosco CrystalGel™ to the rescue! Not only did it give the beef another layer of protection and durability - it also provided a great shiny “wet look” for our juicy fake raw meat.
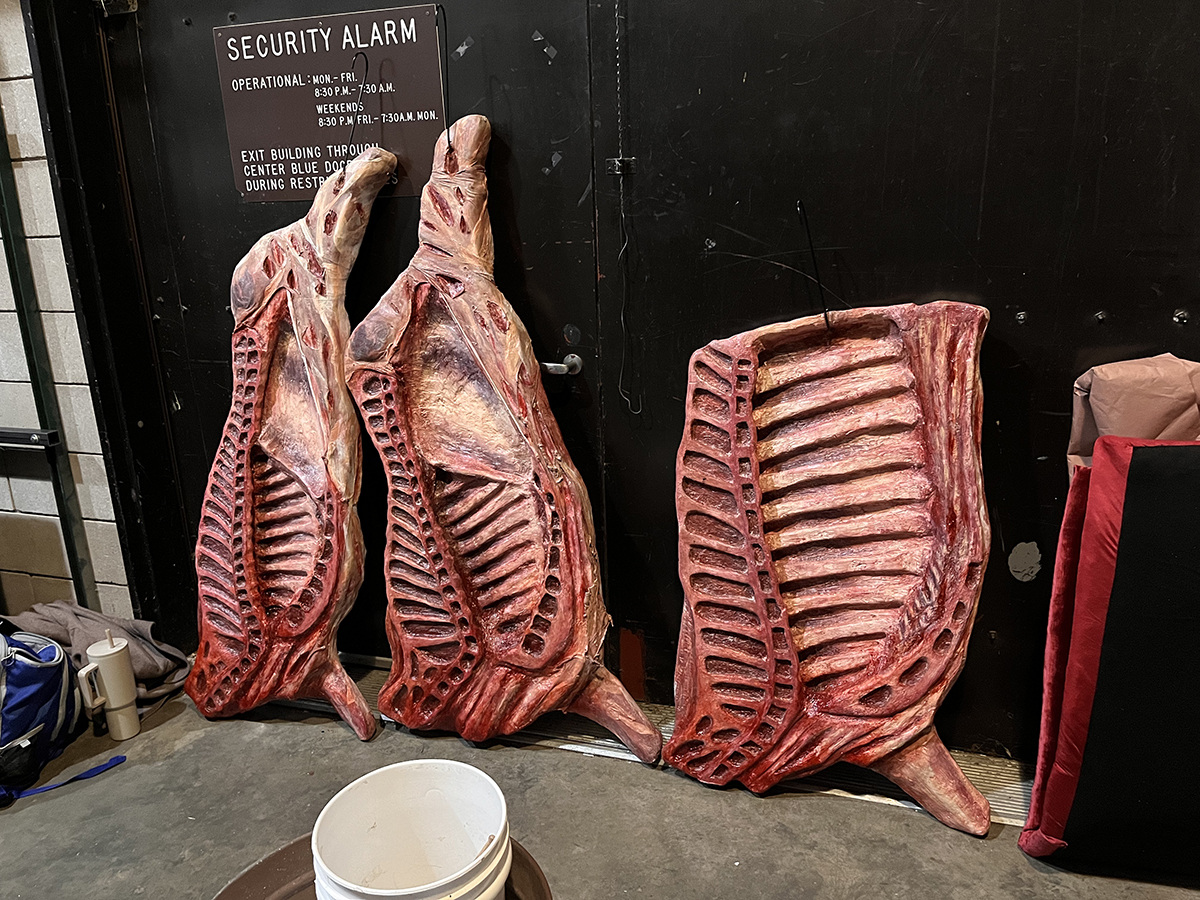
Although Ursula and I were very proud of Jacey’s work, we just weren't totally sold on the believability of the sculpts and felt they needed another layer of something… something like skin, tendons, and fat. This is where Jacey really got to play around! She experimented with adding things like ripped pantyhose onto some parts and into others, then shoving fabric and batting under parts of the stockings to create an effect of fatty muscles and tissue.

And now, for the pièce de résistance. After lots of experimentation and samples, Jacey discovered a technique that perfectly created the semi-translucent layer of fat by decoupaging on white tissue paper with CrystalGel.
The final step was making sure they felt freshly butchered - which meant adding blood. Creating an FEV with shellac and leather dye added a perfect layer of wet looking blood - that was actually dry to the touch.
Goal: Create a leg shank that can be cut in half, torn apart, and then ooze blood.
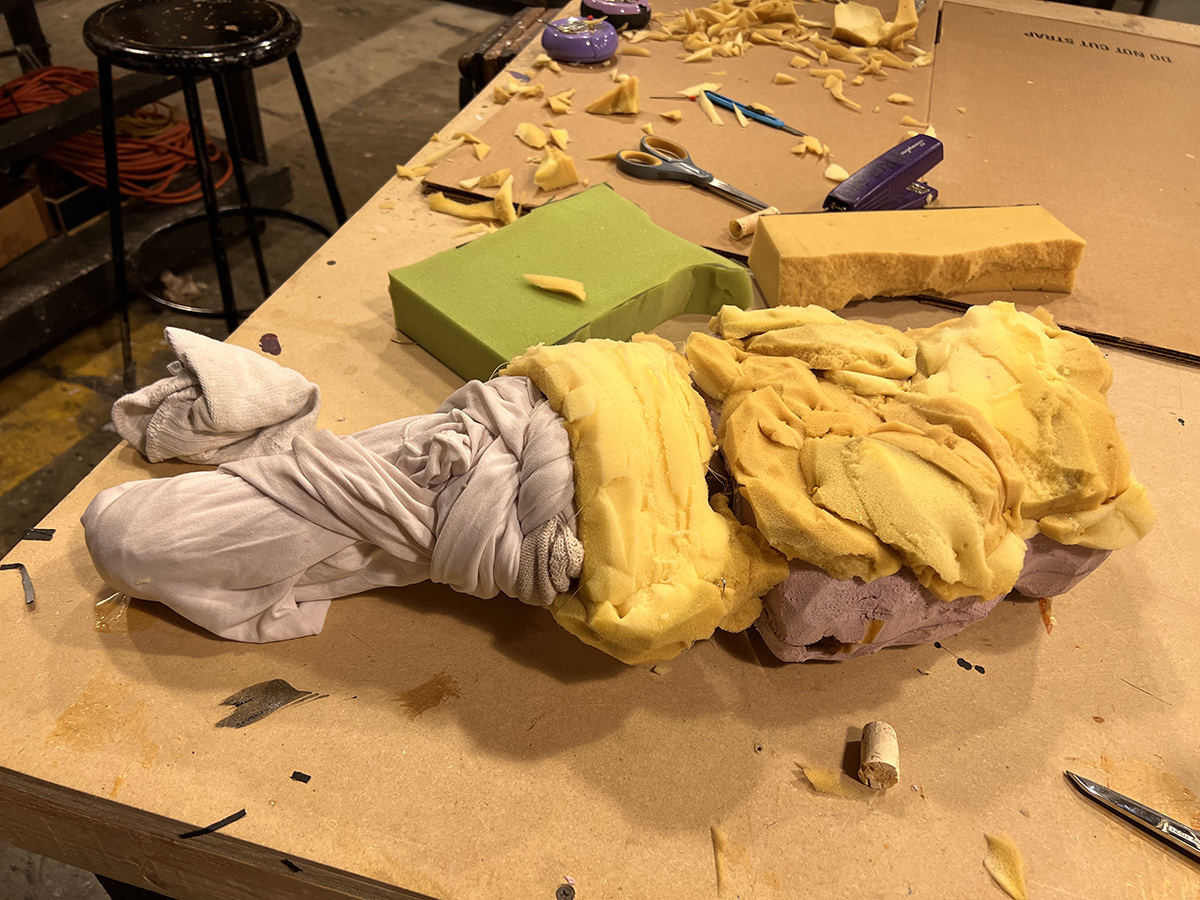
This project required a bit more out-of-the-box thinking, and a traditional hard foam alone wasn’t going to be the right fit. Jacey also had to figure out a method to reliably pull the leg apart for every performance. She ended up fashioning two pieces of PVC to create two bones. The top bone had an elbow socket on one end, and the bottom bone had a piece of cork attached with pantyhose that could be “plugged” into the socket bone, and then pulled apart. Then she used Rosco FlexBond to attache a Frankenstein-like concoction of fabric, socks, and upholstery foam to her two fake bones in order to create the shape of the leg shank.
Once again, a coat of Burnt Sienna was used as the base color. We were all surprised at how realistic the foam looked on its own, but we got the CrystalGel back out to add a protective “wetness” coat and Jacey also applied her patented CrystalGel/tissue paper fat layer again before adding her bloody shellac details.

The top section of the shank could be filled with stage blood before the show, which would gush out as the butcher hacked into the prop and pulled it apart on stage. Watch Jacey demonstrate how the pull works in the video below.
Goal: Create a batch of realistic foam steaks that could be wrapped in butcher paper on stage.

Want to know how to make fake raw steak? Well, at this point, Jacey didn’t because she already knew! She had refined her process and steps in the prior projects, so everything went quicker and looked more and more disgustingly real with every pass. So, when it came time to make the prop steaks needed for the show, Jacey had her fake foam meat techniques down pat.
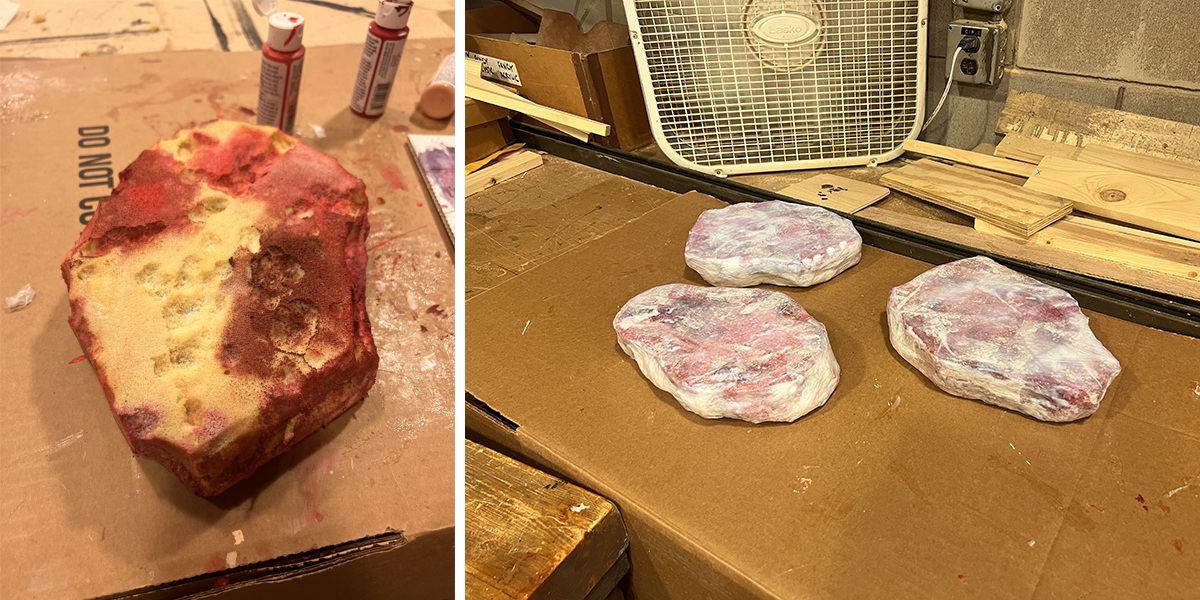
Jacey used upholstery foam to create the general shape of the steaks, then repeated her process of basing with Burnt Sienna and a brighter red, covered the steaks with a layer of batting and her CrystalGel/tissue paper decoupage, before giving them a final pass of glazed color. For the record - the irony of using so much Burnt Sienna to make raw-looking meat was never lost on me.
One of the best parts of working in educational theatre is watching your students learn through experimentation and achieving their own "A-HA" moments. But that can’t happen if you don’t give them the tools and support to do so. By introducing Jacey to a full menu of Rosco Coating Products and Scenic Paints - she was able to serve up a feast of fake raw meat for the audience to enjoy.
Behind-The-Scenes Photos: Jacey Stewart and Angelique Powers
Production Credits:
Director: Talvin Wilks
Scenic Designer: Jeni O'Malley
Lighting Designer: Jacqulin Stauder
Costume Designer: Caroline A. Zaltron
Sound Designer: Bailey Fenn
Angelique Powers May 16, 2024 Questions?
Guest Author Angelique Powers has an MFA in Scenic Art Design from the California Institute of the Arts and has been professionally painting theatrical scenery for over 25 years. A Founding Member of The Guild of Scenic Artists, Angelique also shares her knowledge, passion and experience with her students at the University of Minnesota as a scenic paint instructor. To see Angelique’s work, be sure to explore the portfolio on her website – Qpowers.com.