

In a recent Scenic Route blog article published by The Guild of Scenic Artists, I shared my experience teaching the Advanced Scenic Art students at The University of Minnesota the coveted skill of translucent painting using Rosco Fluorescent Paints. To teach this scenic painting technique, I revived a Neon Sign project that I first demonstrated back in 2019 as a part of a USITT Conference Professional Development Workshop (PDW). Excerpts from that Scenic Route article outlining my process and results are below.
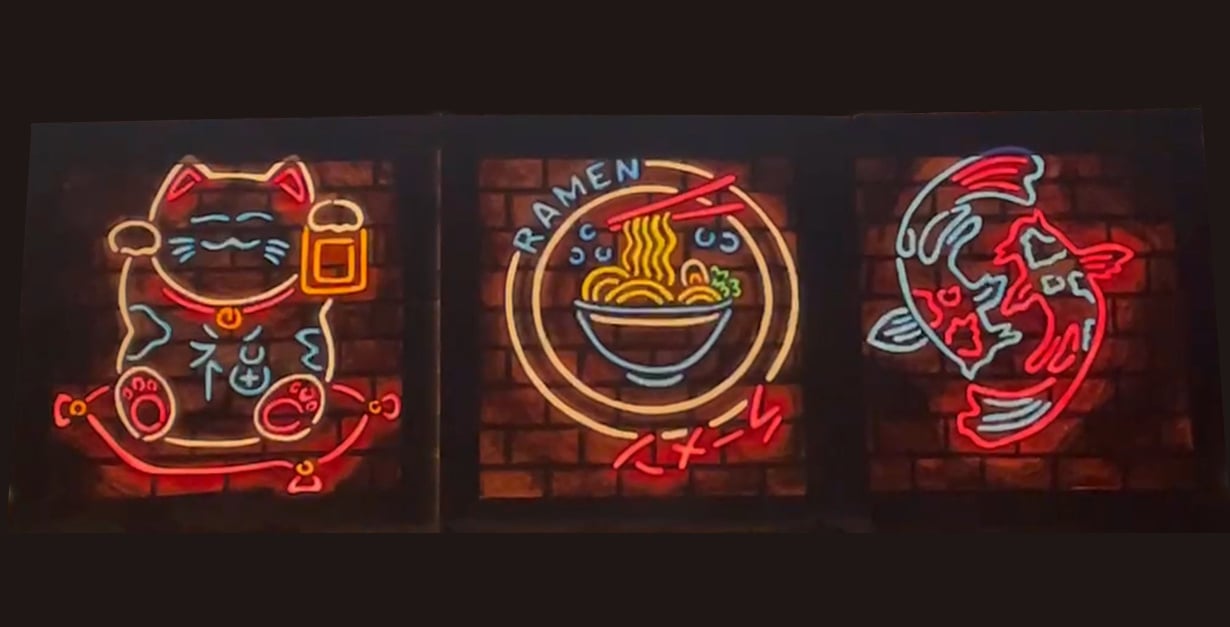
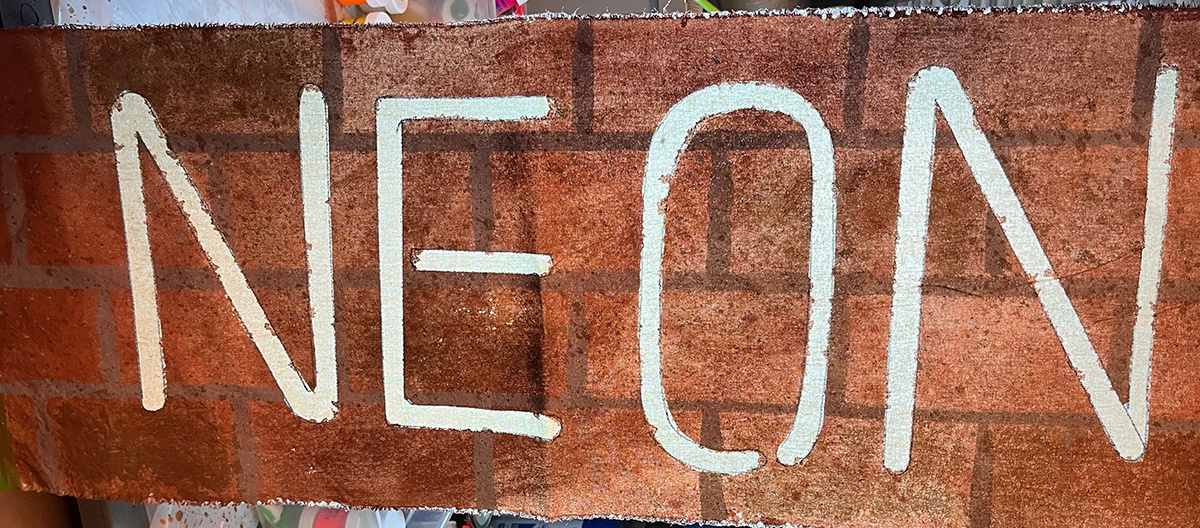
 Neon Sign rendering for the USITT 2019 PDW on Painting Translucencies
The “trick” to creating a color-changing translucency is having both sides of the muslin painted. The front needs to have areas of muslin that are either left completely raw or are only painted with thin washes of color. The back of the muslin is painted with a “barrier layer” of starch and/or sealer, and then bright color washes are applied. These are often used as “day to night” sunset transitions and can truly transform the space when lit properly.
My students were wowed at how bright the colors of Rosco Fluorescent Paints were and that they packed a big punch, but they also noticed how thin and transparent the paint was. This paint’s “thin” quality is a superpower. When it comes to creating stunning translucent color-changing effects – we never had to add water and we controlled things by simply adding more layers without fearing that it would go opaque.
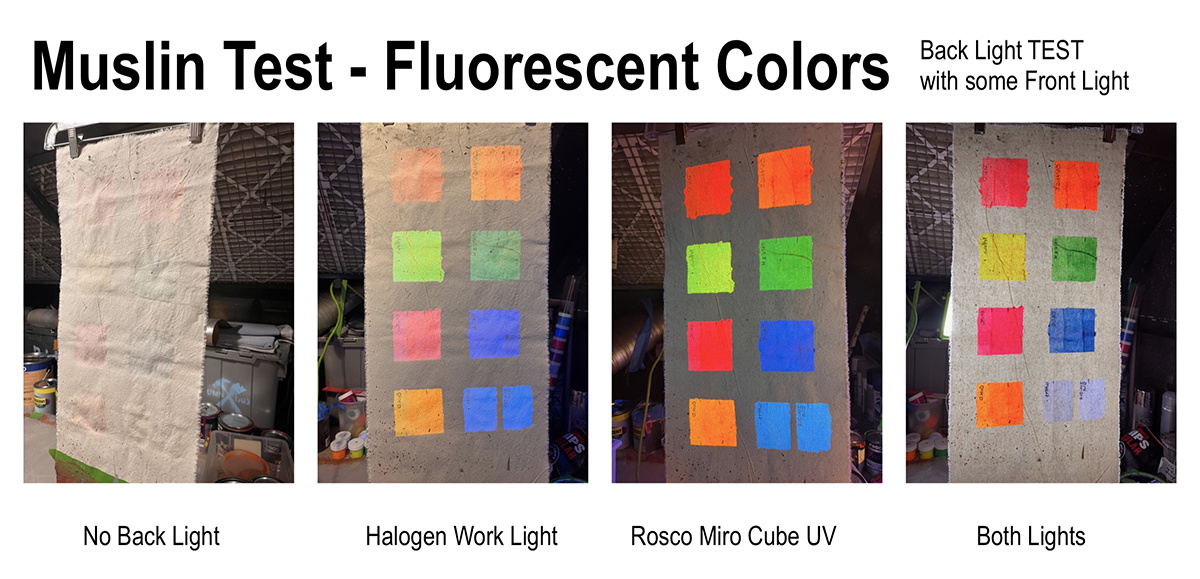
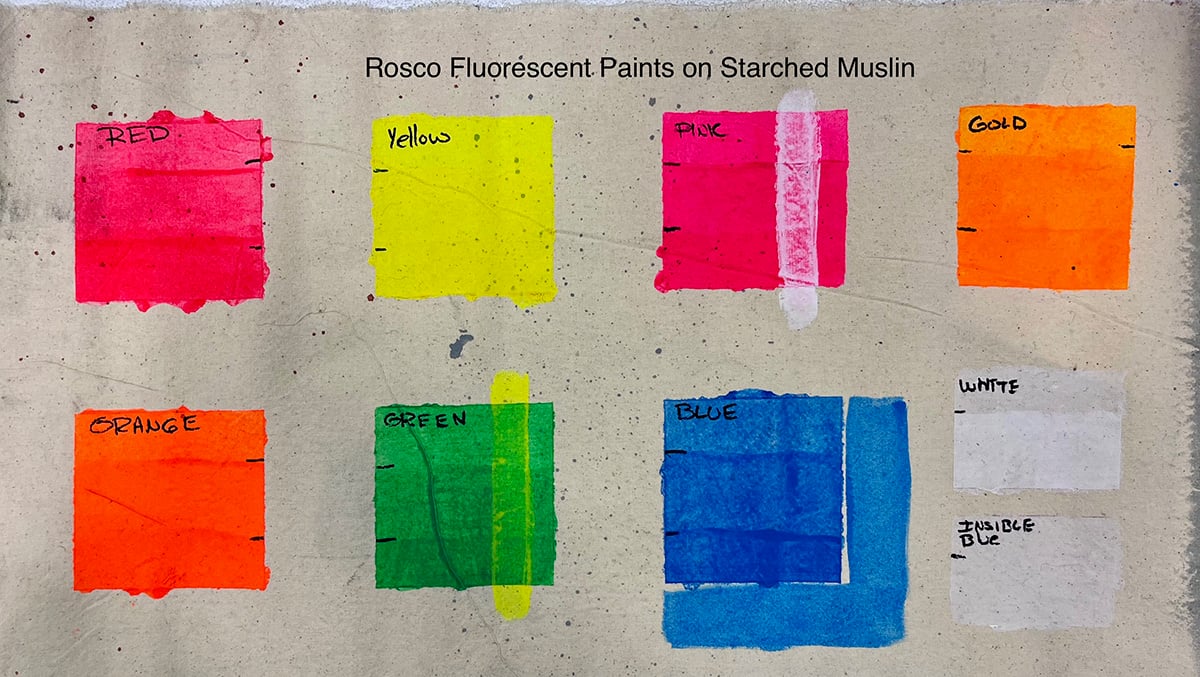 In this photo, you can see the colors straight out of the can (top swatch) and what
added layers of color look like (middle and lower swatch).
The other not-so-secret power of Rosco’s Fluorescent Scenic Paint is how well it reacts to UV lighting to create a neon-like glow. It is also nice to note that you don’t always need a UV light to get vibrant neon-like colors – but it certainly helps.
We tested this theory by backlighting the piece of muslin with fluorescent paint swatches using four different setups:
For the final presentation, I asked MFA Scenic & Lighting Design student Jacqueline Stauder to join our class and help create a real lighting demonstration. She used standard theatrical lighting instruments focused from the grid and positioned our Miro Cube UV on the floor for the backlight.
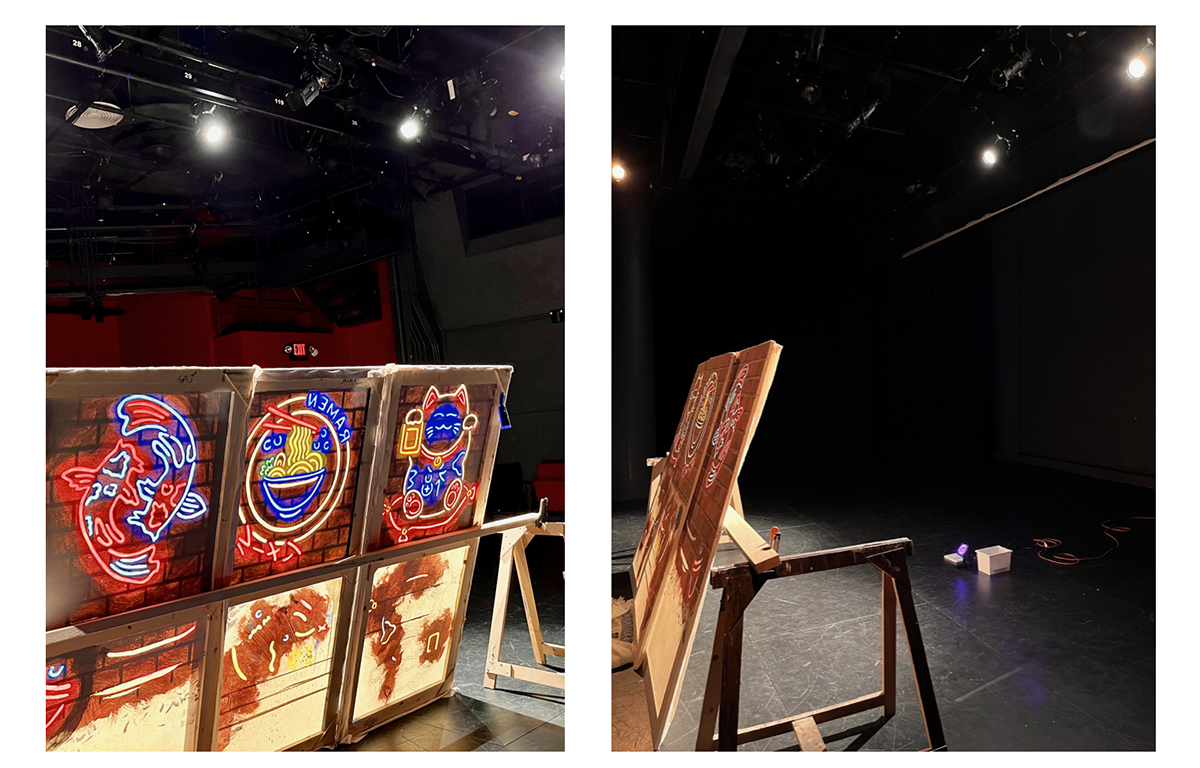 Image shows the student projects propped up on a stage under stage lighting. The image on the
left shows a back view of the projects while the side-view image on the right shows the UV backlight.
Of course, these effects are better seen with dynamic lighting transitions – so enjoy this quick video that shows what happens when you transition from full front light to only UV backlight!
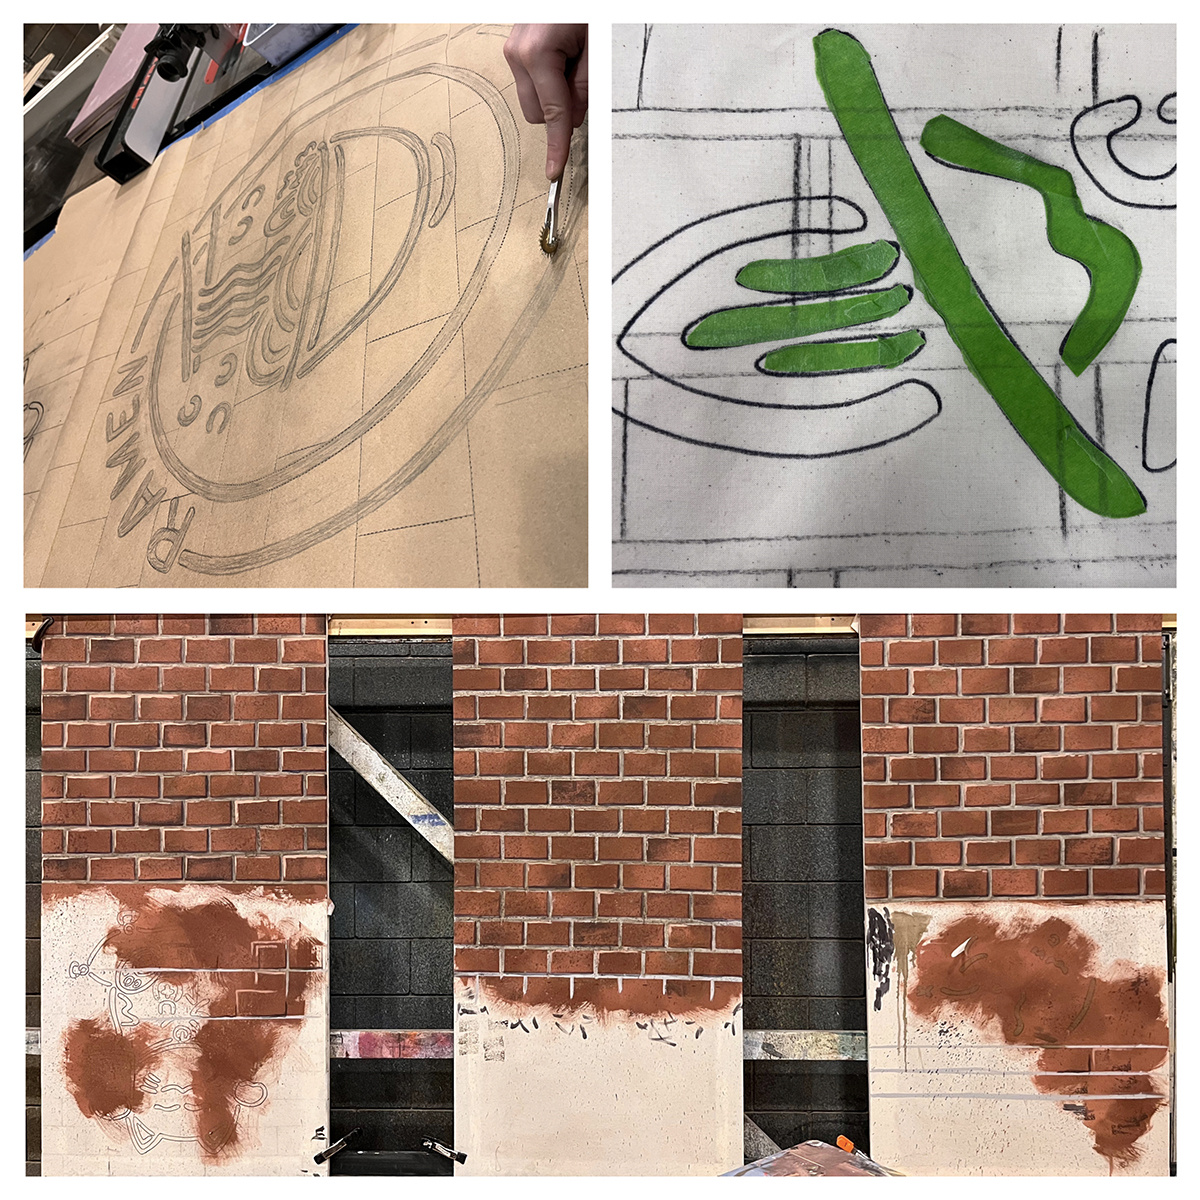
Reflecting back, if I were to repeat this project, I would use a different method for painting the bricks. I would start instead with thin washes of grey for the grout and then perhaps use a stamp or cut roller to paint the bricks. This would reduce the layers of paint, which would have helped the grout to glow better when it was backlit. However, as it is, these projects turned out to be an en-LIGHT-ening educational opportunity for my students that will truly shine in their portfolios.
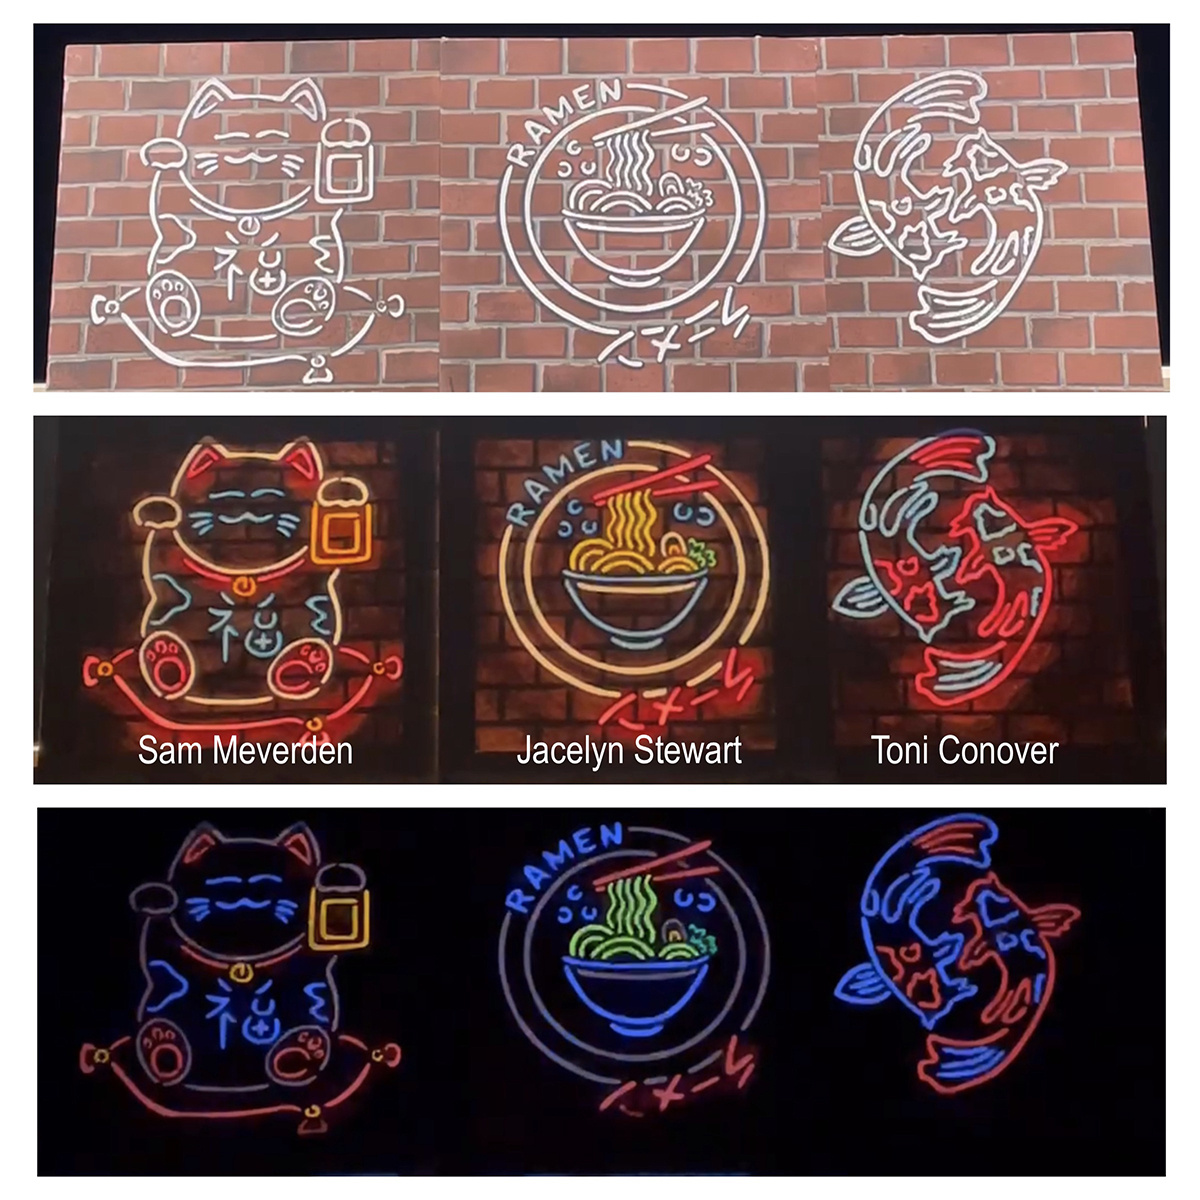 A front view of the projects under different types of light: full front light (top), a blend
of front and backlight (middle), UV-only as backlight (bottom).
If you want to learn more about my techniques and process for painting neon scenery, be sure to read the full article in the Guild of Scenic Artists “Scenic Route” blog. If you’d like to learn more about the key elements we used to create these black light effects, please visit the Fluorescent Paint product page and the Miro Cube® 2 UV365 product page on the Rosco website.
Photo Credits:
All photos and videos were taken by Angelique Powers, Toni Conover, Sam Meverden, and Jacey Stewart.
Contributing Artists:
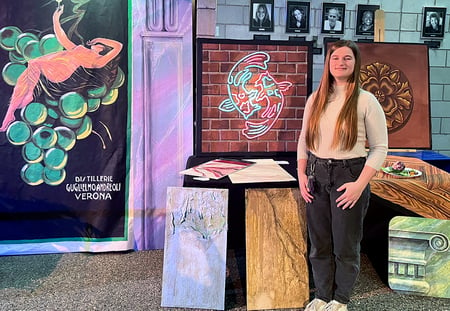
Toni Conover – 2024 BA UMN Graduate and aspiring Scenic Artist.
Instagram: @tonidoestheatre

Sam Meverden – 2024 BA UMN Graduate and aspiring Scenic Artist/Designer.
Website: https://srmeverden.wixsite.com/my-site
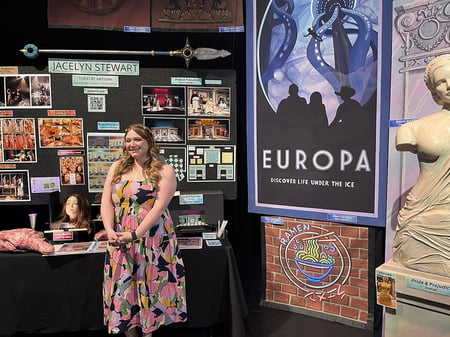
Jacelyn Stewart – MFA Scenic and Prop Design Student at UMN.
Website: www.jacelyndesign.com
Jacquilin Stauder – MFA Scenic and Lighting Design Student at UMN.
Website: www.jacqulinstauderdesign.com
|
Additional Reading: 4 Fluorescent Paint Testing Results To Brush Up On Before Painting UV Scenery New & Improved Miro Cube® 2 UV 365 For Out Of This World Black Light Effects |
Angelique Powers September 05, 2024 Questions?
Guest Author Angelique Powers has an MFA in Scenic Art Design from the California Institute of the Arts and has been professionally painting theatrical scenery for over 25 years. A Founding Member of The Guild of Scenic Artists, Angelique also shares her knowledge, passion and experience with her students at the University of Minnesota as a scenic paint instructor. To see Angelique’s work, be sure to explore the portfolio on her website – Qpowers.com.